Loading an Object using Staging table based LTMC
By Imran, Mohammad February 28, 2023 under LTMC
In this approach, unlike file based template the inbulit tables are made available for every objects. Tables details will be displayed once you enter into the object in the LTMC Portal. You will need to import those tables in your BODS environment or any other environment where you can insert records in them. Once tables are ready with the data, anyone can initiate the loading same as file based approach.
- This approach is widely used in the Data Migration project as it supports high volume data transfer.
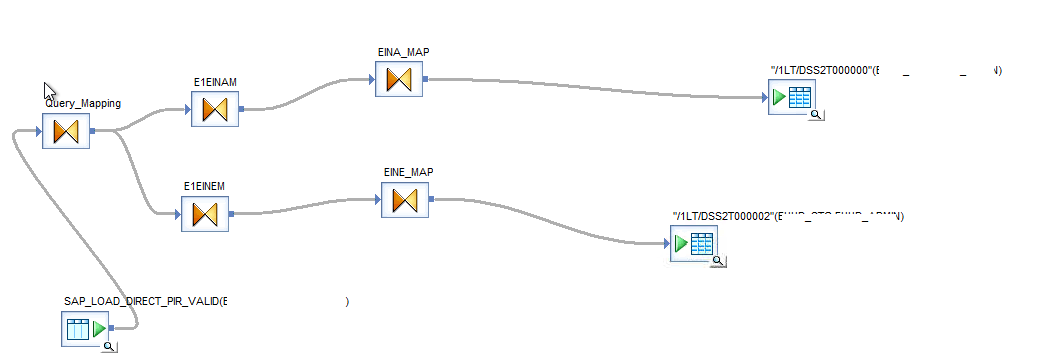
- BODS is the tool which helps to insert the records in these tables in large number.
- You need not to maintain any kind of traget structure, these tables get created along with the S4HANA same database where S4HANA would get installed.
- Build a datastore connection in BODS enviorment which will point to S4 Database and import the tables.
Before you start working with an object, you need to have a project created in LTMC portal, and before creating a project you need to have database connectivity avaialble so that you can associate your project to the database where your staging tables will reside.
Creatinging Database Connectivity
This step is necessary to have a connection between Staging database and S4HANA in order to initiate the loading from LTMC to S4HANA.
There are basically two things to be done:
- Run a t-code DBCO and create a new Database connection as below.
- DB Connection - Give a name of your own, this name will be used in LTMC project creation.
- DBMS - Choose a database from the dropdown.
- Enter Username and Password of that database. Password needs to be entered twice.
- Connection info - The host name of your database you used to connect with the database.
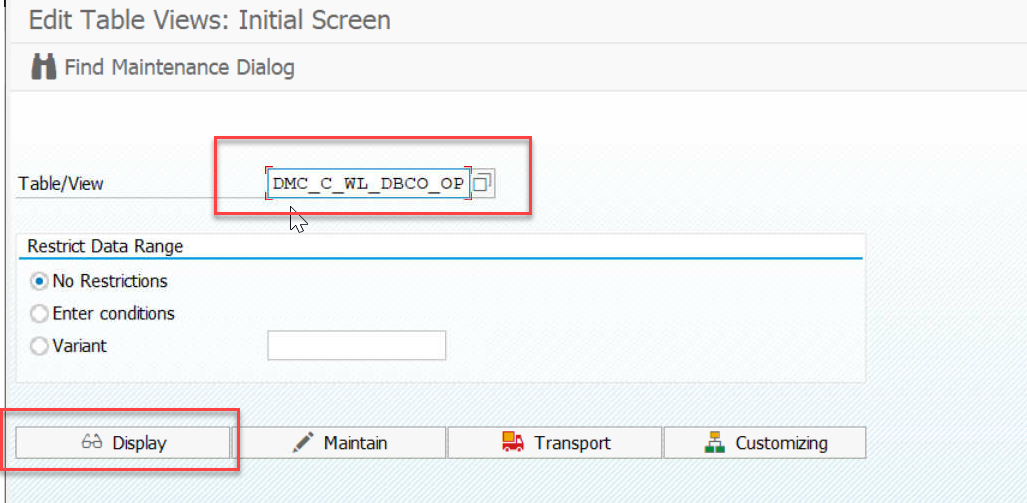
- Run a t-code SM30 and open a table called DMC_C_WL_DBCO_OP as below.
- Create a new entry with the same name that you had entered in earlier step in DB Connection field
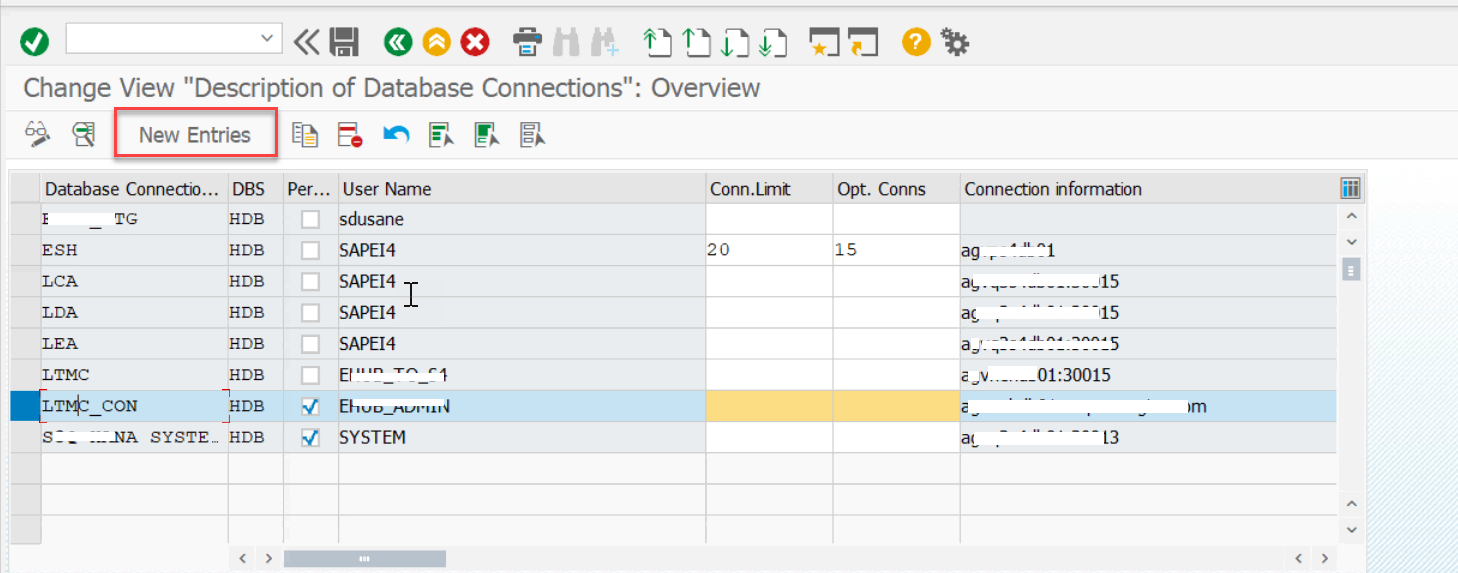
List of connections already created by another users.
Now create one more entry as below.
Once connection details are entered, save it and come back.
The DB Connection is created, now you are good to create a project for this.
The first thing that you will have to do is to run a t-code (LTMC). A browser with LTMC screen will be opened, follow the steps below.
1. Create a Project
If a project is already created, you can use the same if Data Source is Staging Tables or if you want seperate project for your migrations
then you can create one more as below.
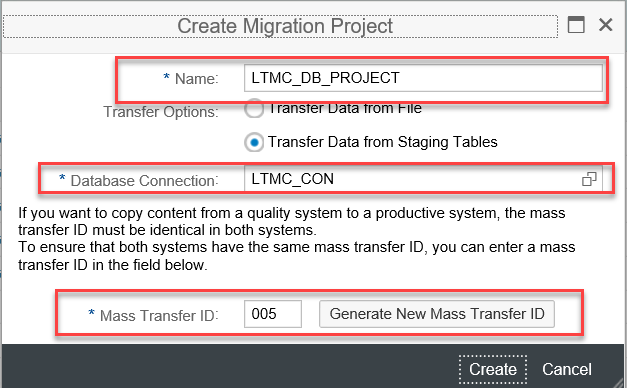
Click on Create.
- Give a name of the project
- Choose the Database Connection that you just created.
- Mass Transfer ID will be auto populated.
- Click on you Create to create the project.
You are done with prerequisites to begin the Data Migration. The above activies are one time, once project is created you can keep on working for various objects on the same project.
Now, Lets begin how we can load an object using Table based LTMC.
1. Select the Object and Tables
The first step for any migration is to search the object you are looking for and indetify the tables.
In this example, we are selecting the object called Purchase Info Record to demonstrate the entire process of Data Migration using Staging table based upload in LTMC.
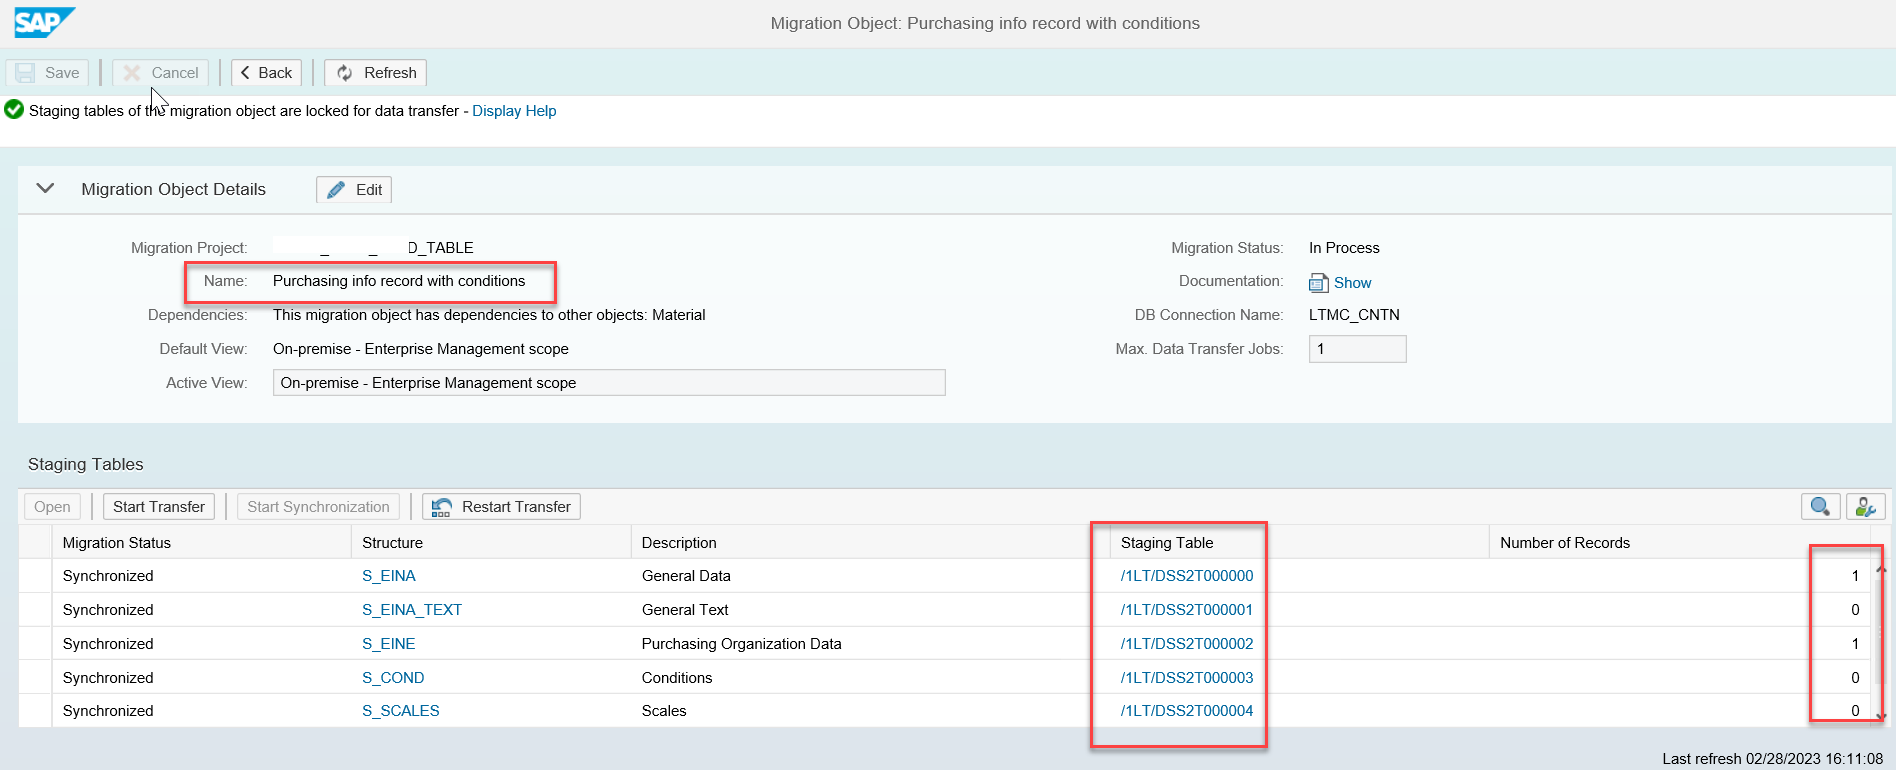
You search and found the object, click the link and you will be able to see Tables associated with this object. The tables will be used to load variuos tabs in the PIR.
But for the demonstration, we will select only General Data and Purchasing Organization Data tables.
If you notice below, the Number of Records shown as 1 in those two tables, that means tables updated with 1 record and ready for Transfer.
2. Import the tables to BODS
The tables we have identified should be imported to BODS in order to insert records in them.
Now, use these tables as your target tables in BODS, build queries and mapping rule according to target fields and then insert the recors by running the job.
3. Start Transfer
Once your tables are ready with the data, now it is time to start transfer.
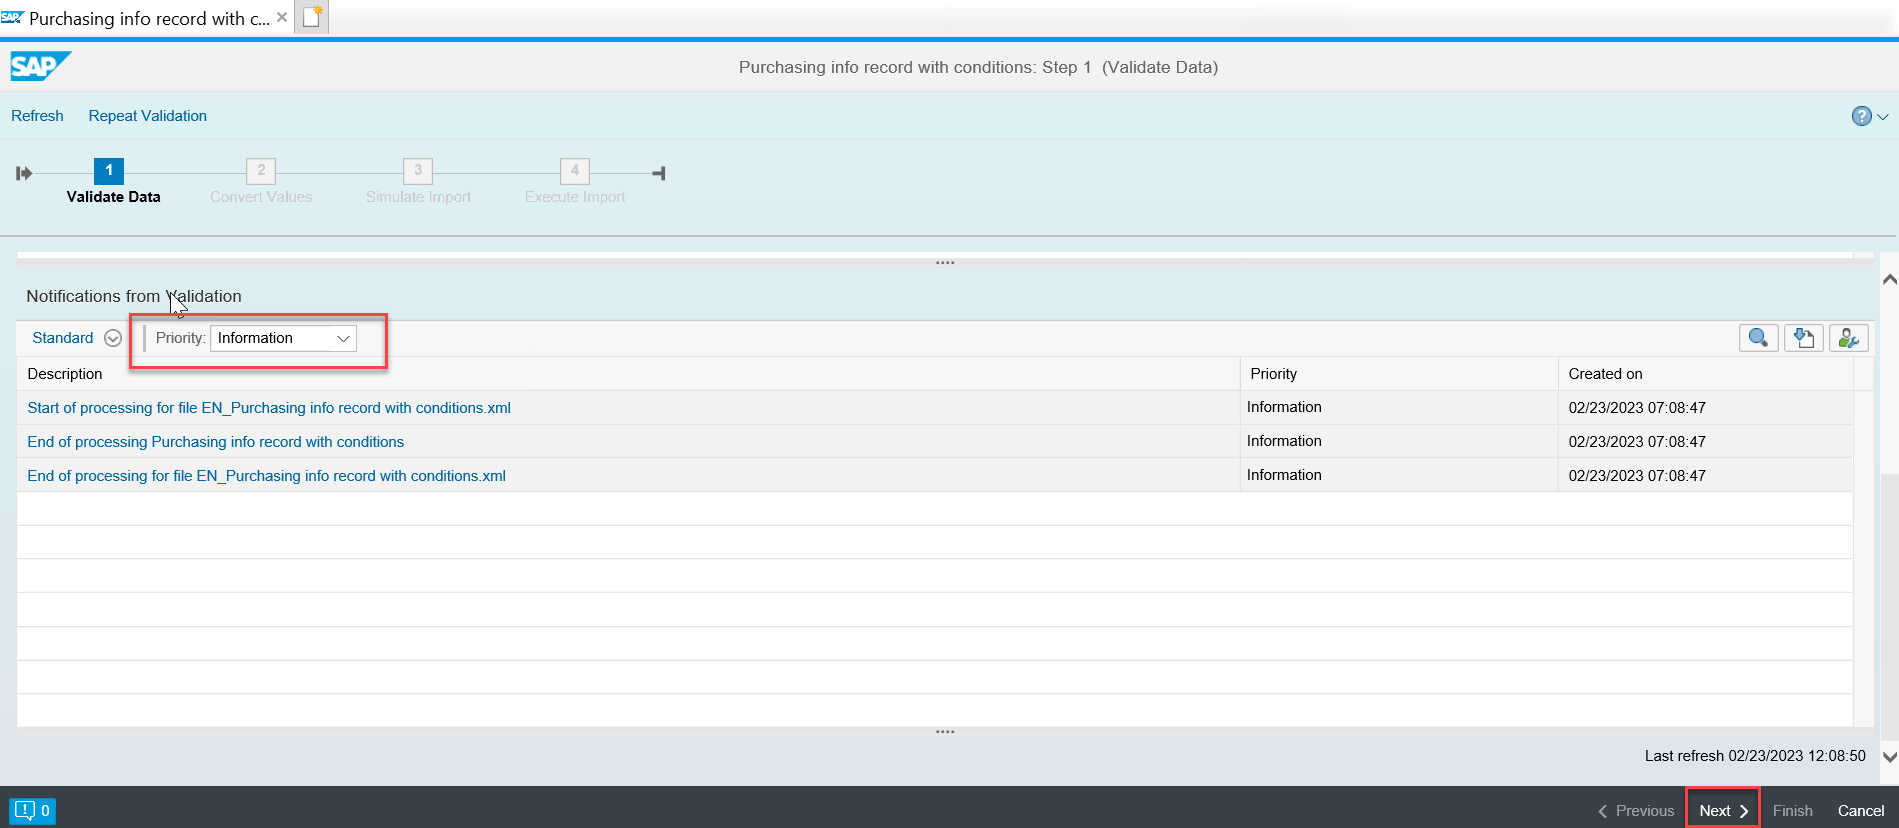
- Make sure number of records are shown correctly. Once you are sure that same number is shown what you had inserted, click Start Transfer
- You may encounter some errors - Data entered incorrectly like date is not is not in correct format.
- You will then need to correct the data at the table level and start from the begining in case any error found during validation. Re-run BODS job after correcting the mapping.
4. Field Mapping
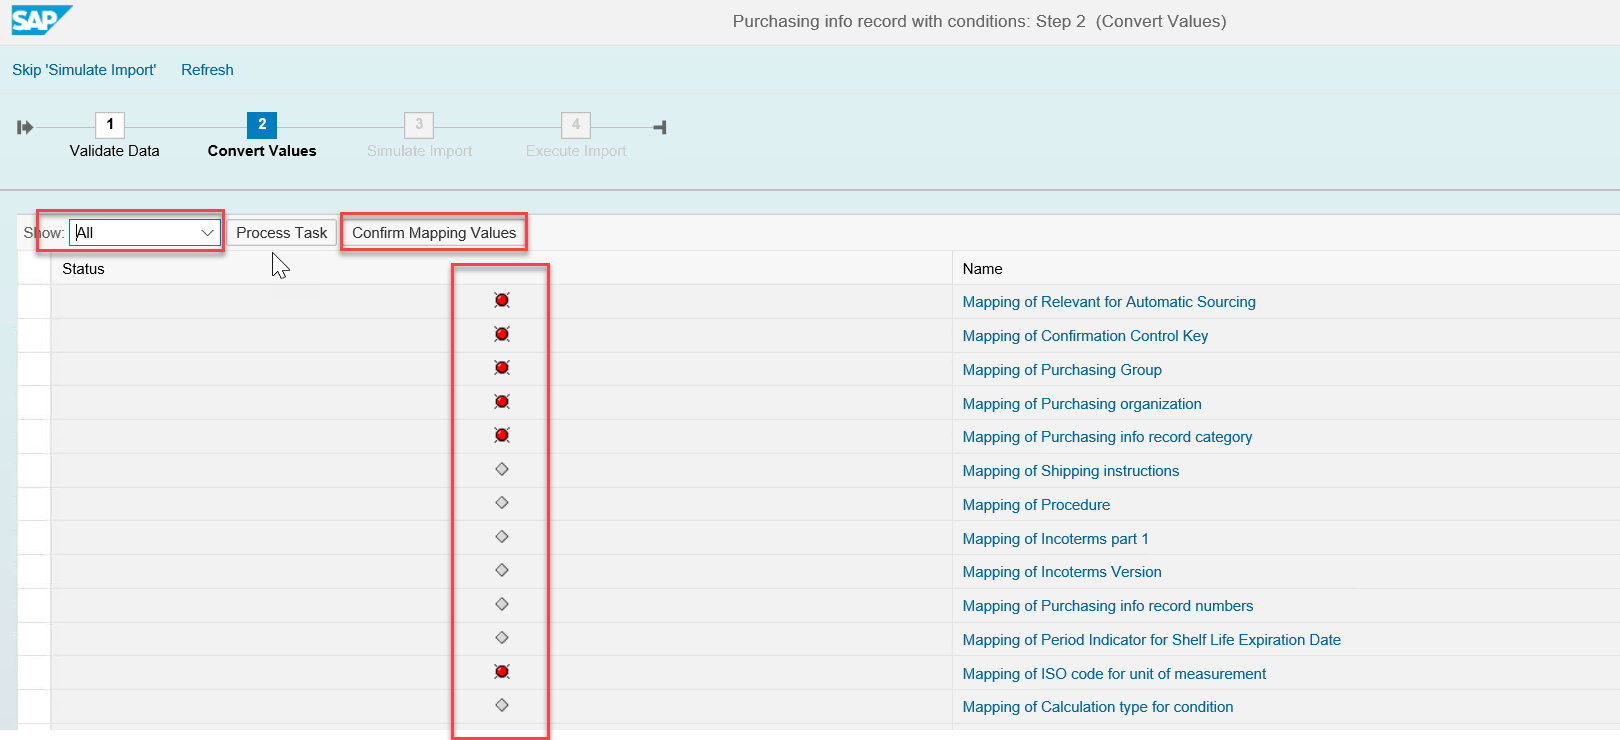
This is very important step, LTMC checks your input and validate possible values available in S4HANA. If the value you have put in your file does not exist in S4HANA then it will ask you enter the mapping manually, if found then LTMC will do the mapping automatically but still you can change the mapping if you want to.
- Sellect All from the dropdown then click on Confirm Mapping Values for the Auto-Mapping.
Signifies mapping required either auto-mapping or manual mapping.
Signifies no action required because the field is free-text.
Signifies mapping found and no further action required. But you still can change the mapping if required.
In case any of the fields could not be mapped in Auto-Mapping then you will need to do it manually.
- Click on the field name highlighted then choose a possible value from S4HANA Target Value drop down. You will notice icon will turn to green. Click Save.
5. Data Simulation
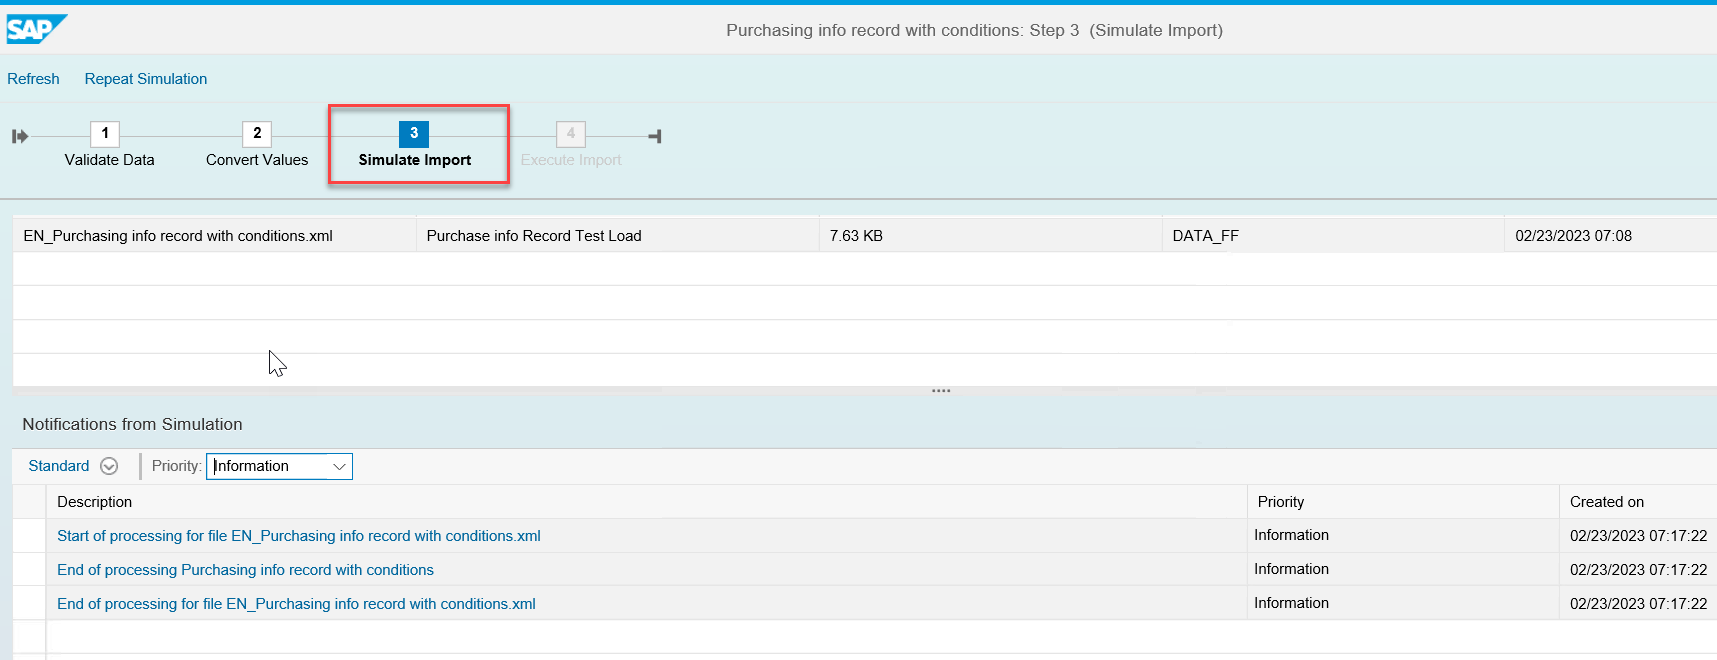
Simulation step is to check your input against S4HANA, it is basically a validation of data against S4HANA. If the system finds any incorrect data against S4HANA then the records will go into error and will not be loaded to S4HANA. In this steps. if no error encountered then simulation will finish with Information in dropdown. Click Next.
Only errored records will not be loaded, other records which do not have any issues will be loaded successfully.
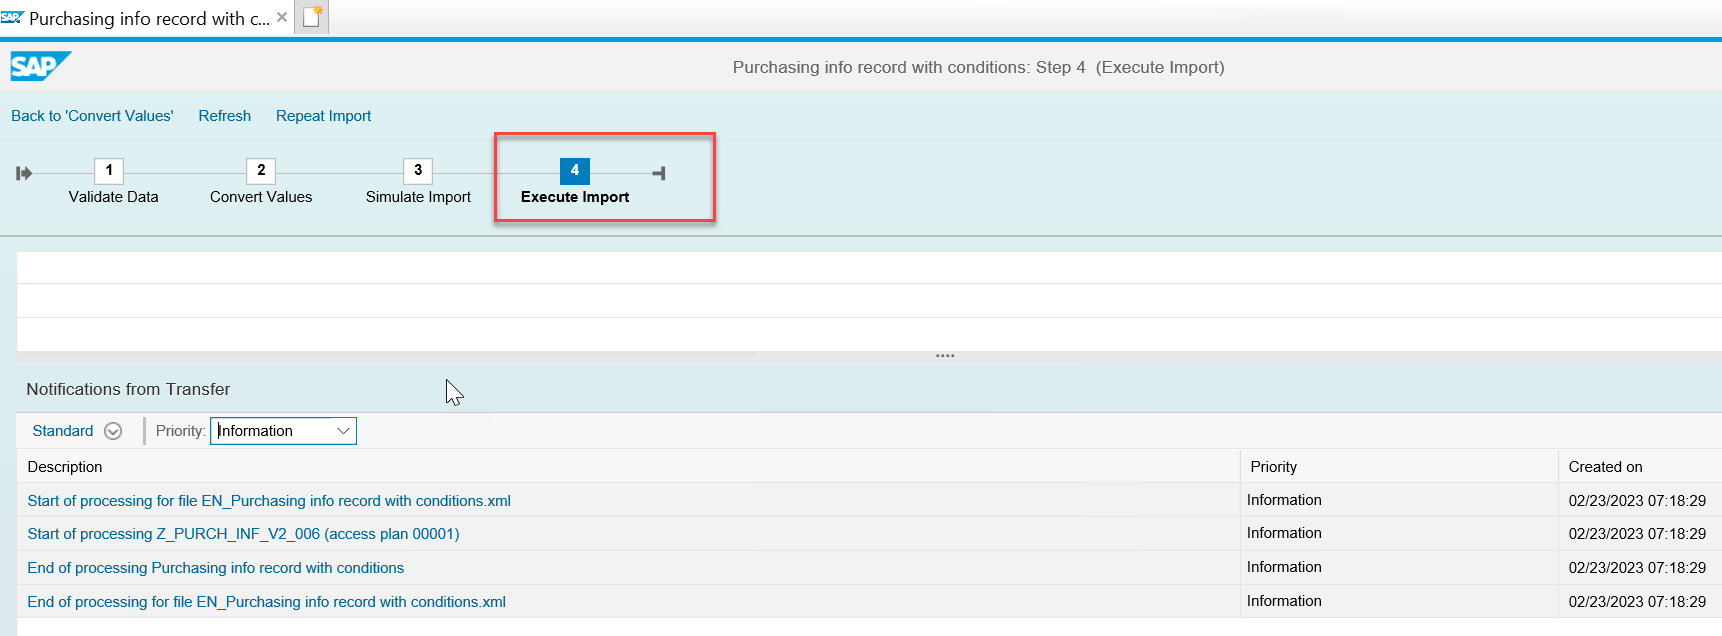
6. Data Import
This is the step which loads the data to S4HANA. Once done click Finish.
Data Validation will be done on every steps, if any error encountered during the process on any step
if the error is related to data, you will then need to correct the data at the table level, kill the session,
and start from the beging.
(re-run the BODS job, Start Transfer, Mapping, Simulate and Import).
