Creating an LSMW Program for SAP Material Master
By Imran, Mohammad — February 14, 2023 under LSMW
The Legacy System Migration Workbench (LSMW) is a valuable tool within SAP for performing data migration, particularly when alternative loading methods are not applicable. Although it can be effective for updating individual fields, it is generally not recommended due to its inability to handle hierarchical data and its relatively slow performance.
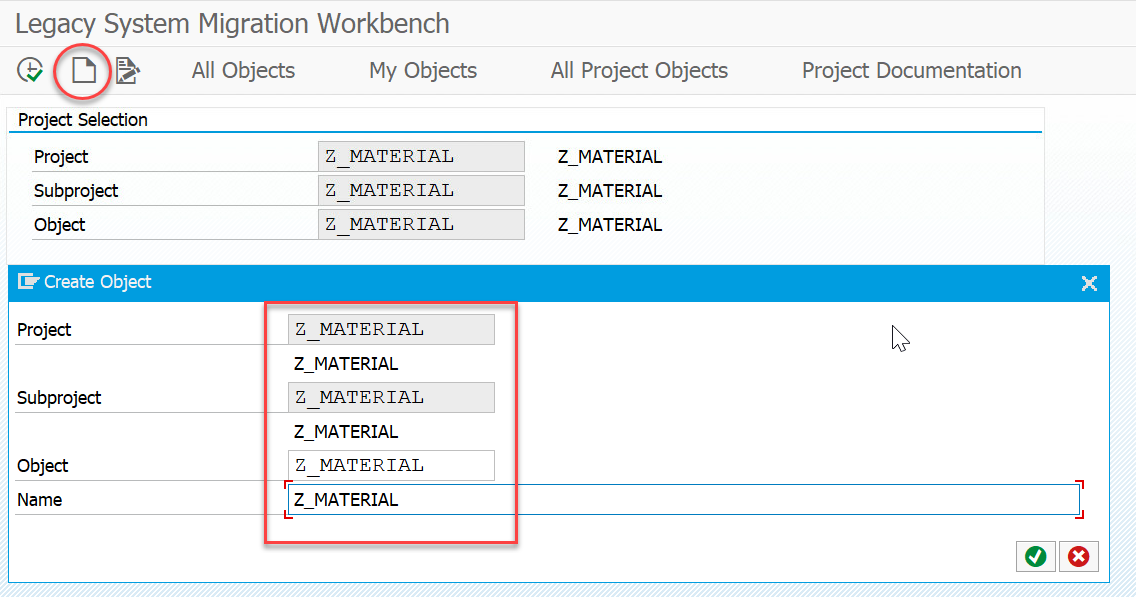
Step 1 - Create LSMW Project
Execute transaction code LSMW to begin creating the LSMW project. Define the Project, Subproject, and Object. Once these have been created, click on Execute to proceed.
Step 2 - Define Object Attributes
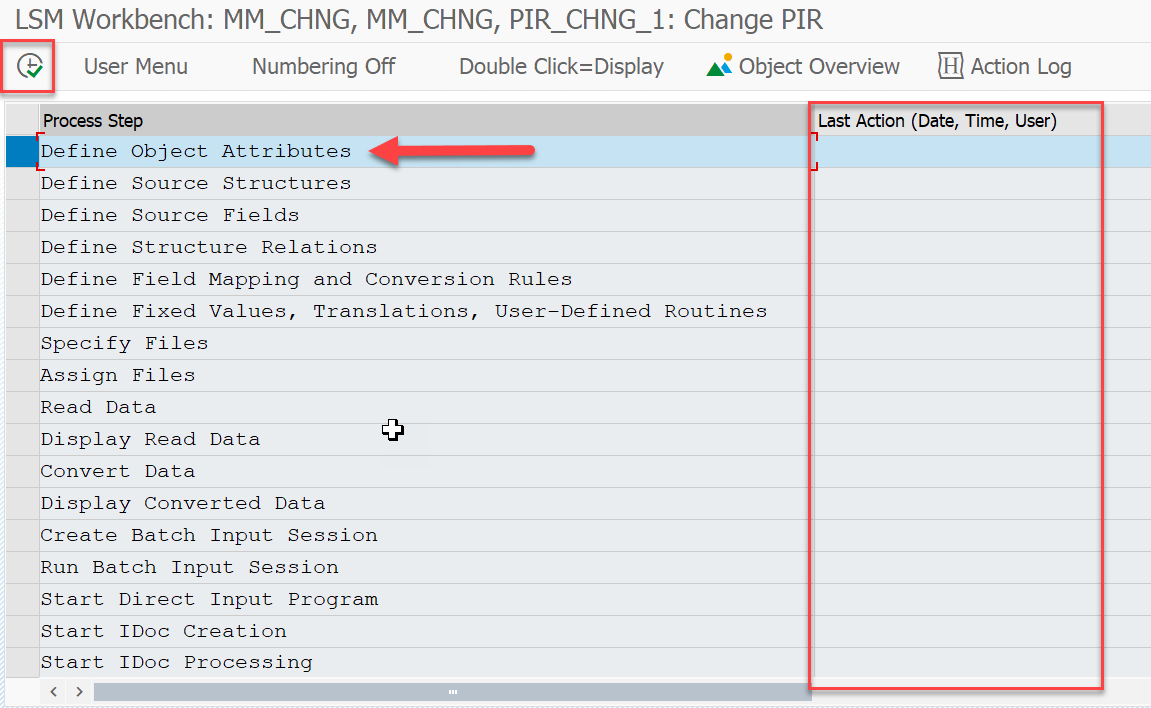
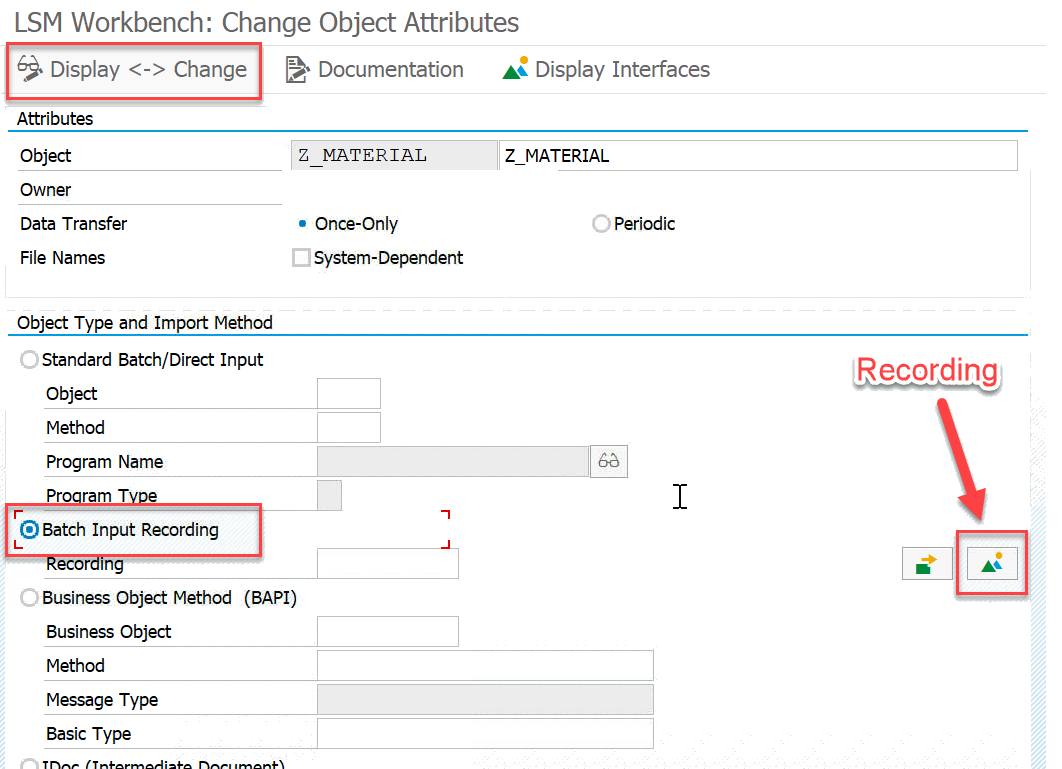
2.1 - Choose Recording Option
The recording function captures your actions, so it's important to be familiar with the transaction code (T-code) process beforehand. In this example, we will demonstrate how to update specific fields in the MRP1 view using the MM02 T-code.
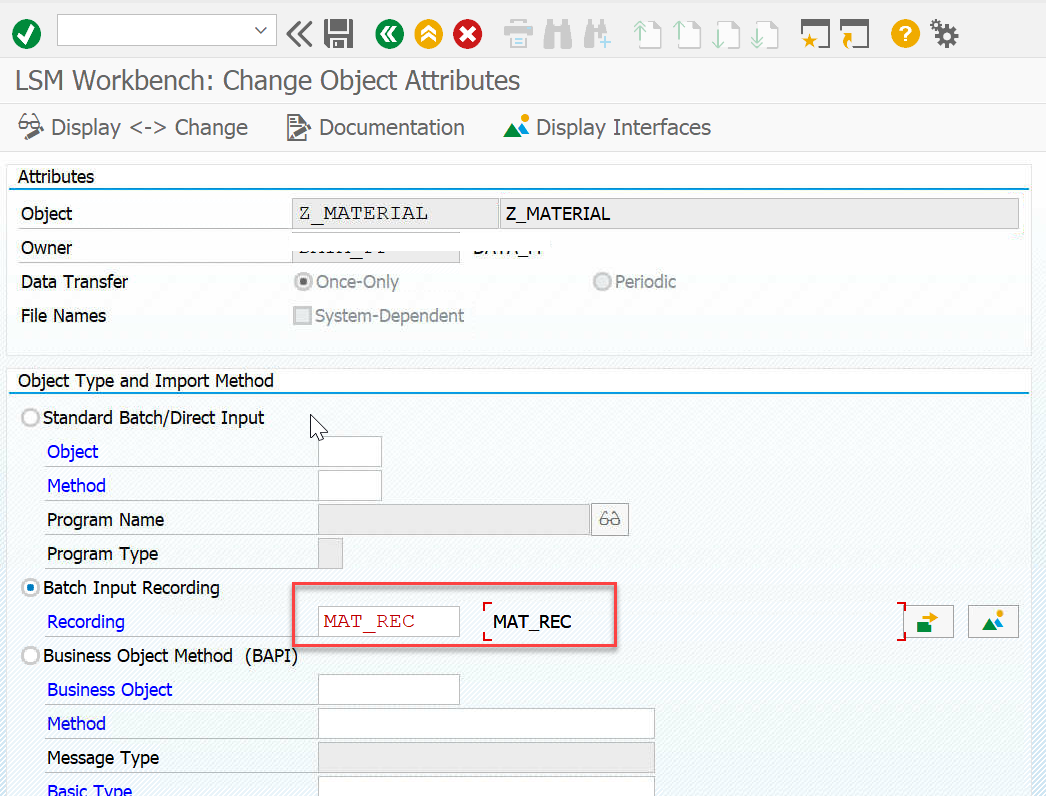
- Switch to Change Mode.
- Select Batch Input Recording and click the Recording button.
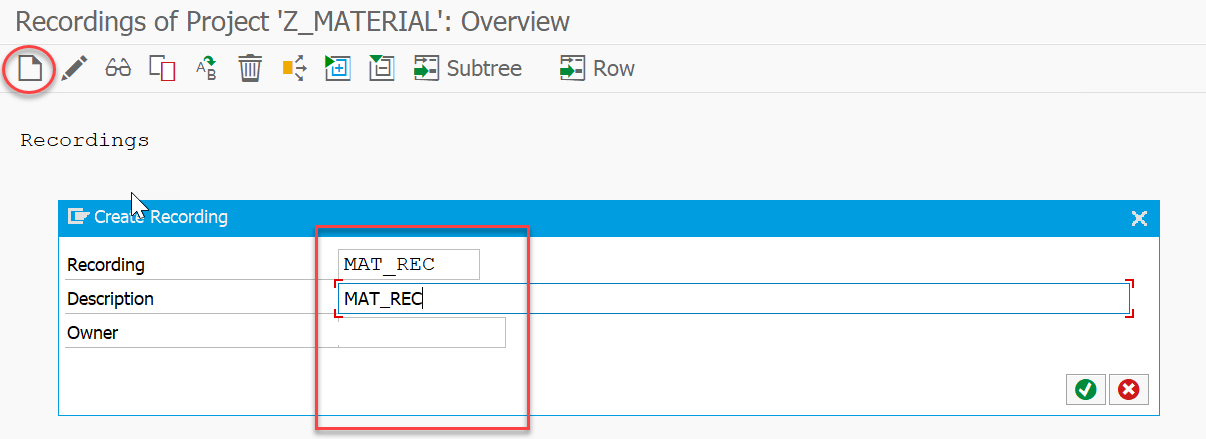
2.2 - Create Recording File
- Click the Create button to generate a new recording file.
2.3 - Material Change Step 1
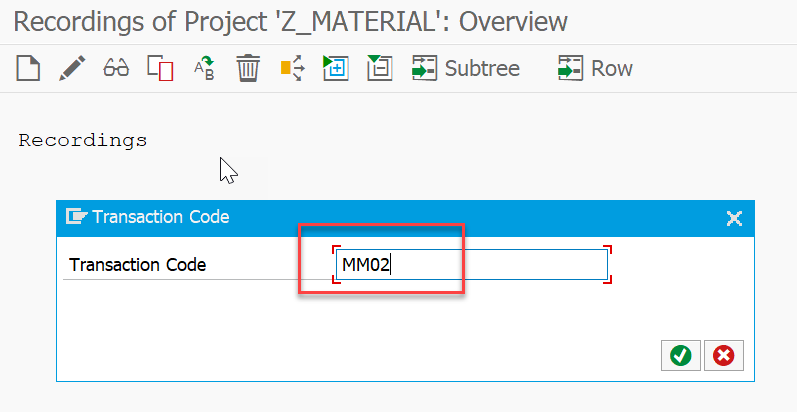
In this step, we will demonstrate how to modify certain fields in the MRP1 view using the MM02 transaction code.
- Enter the T-code MM02 and press Enter. MM02 is used to change material master data.
2.3 - Material Change Step 2
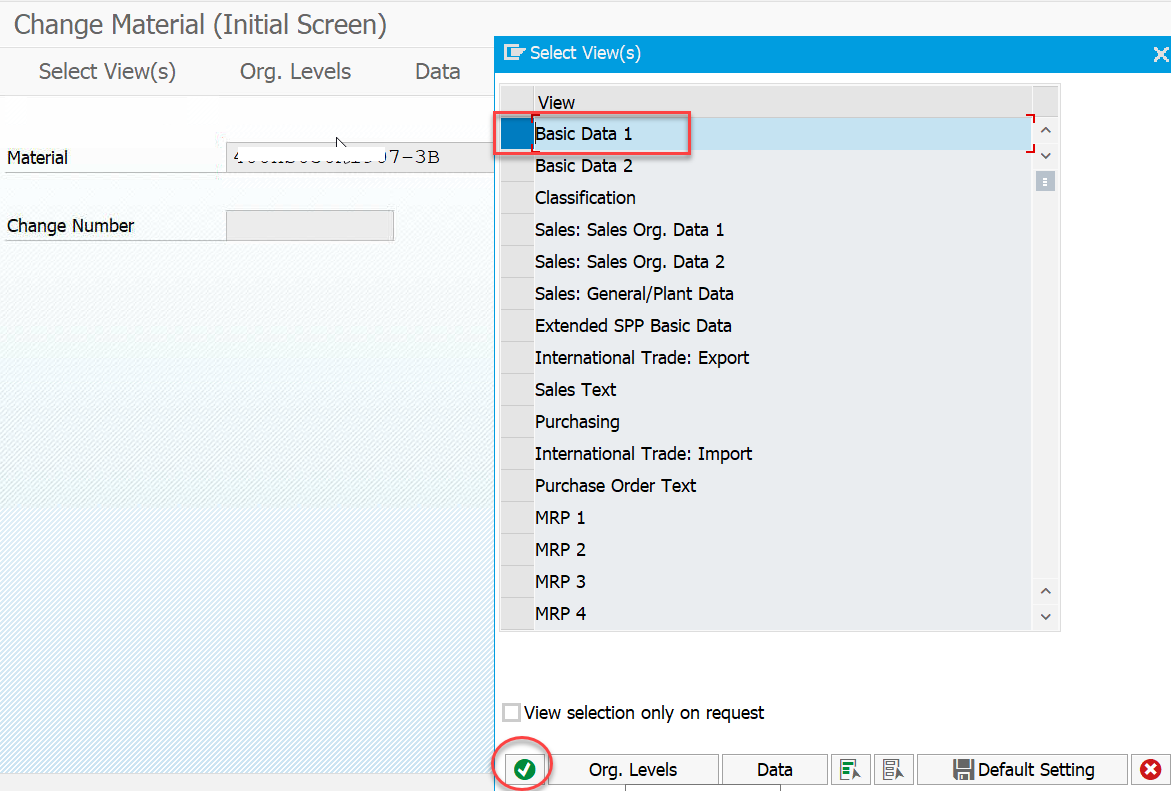
- Select the MRP1 tab from the list of available views.

2.4 - Material Change Step 3
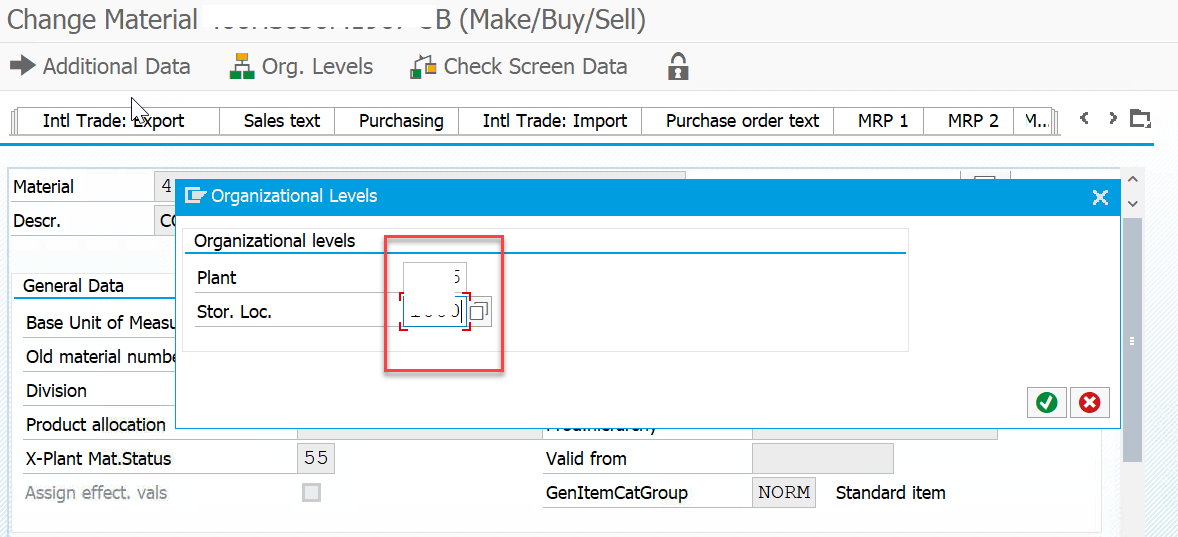
- Enter the appropriate Plant and Storage Location values.
2.5 - Material Change Step 4
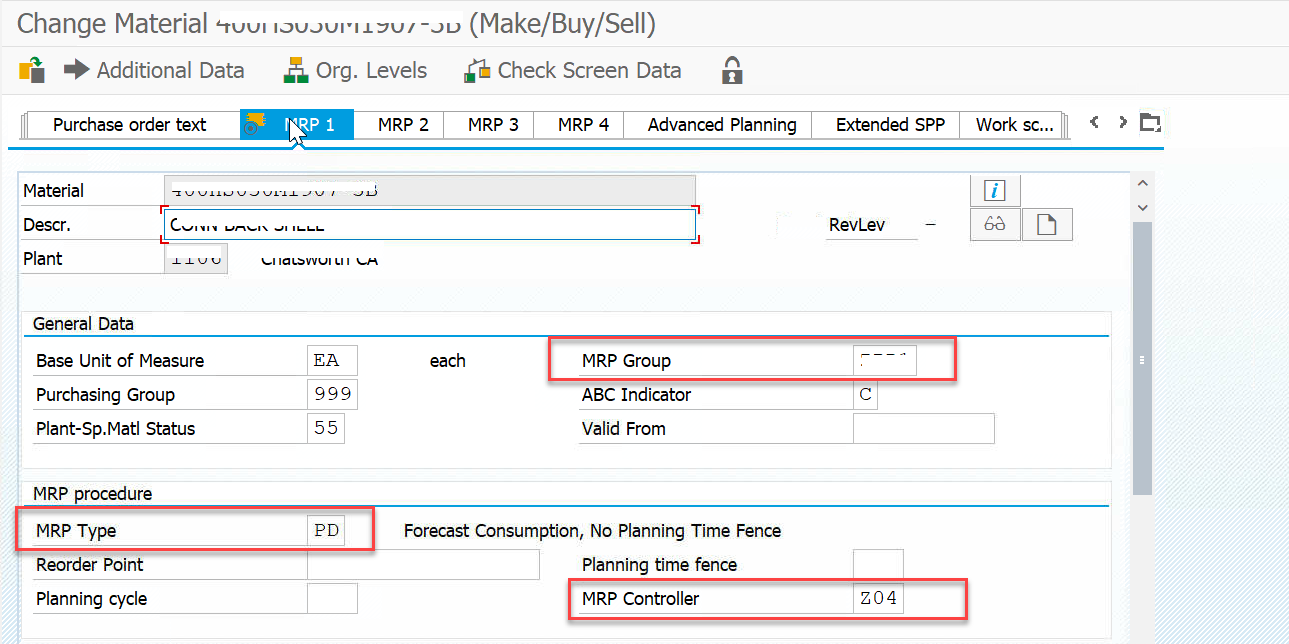
- Modify the necessary fields. In this example, we will update the MRP Group, MRP Type, and MRP Controller. Once the changes are made, click Save.
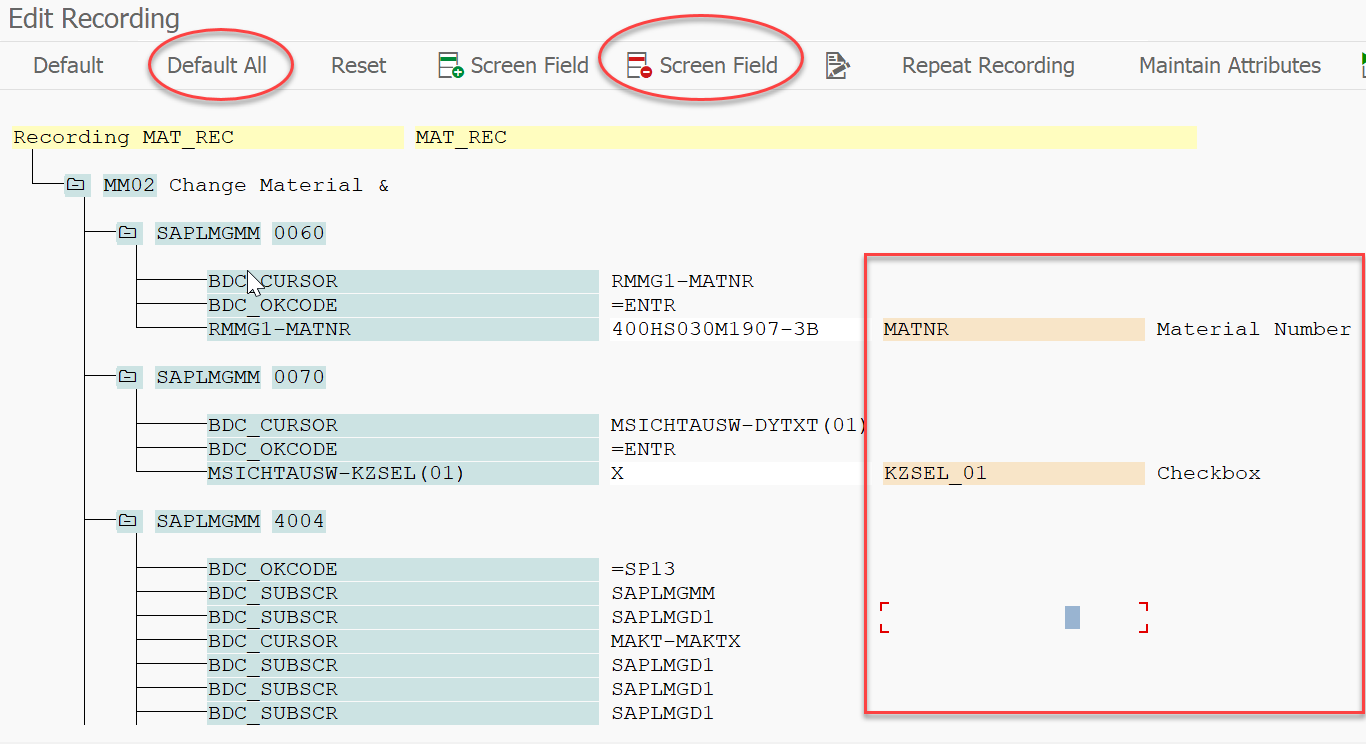
2.6 - Fields Adjustment
During this step, you may encounter additional fields that need to be removed, as they could prompt for input during execution. Make sure to delete only the unnecessary fields and leave the required ones intact.
- Click Default All to display the fields and their corresponding descriptions.
- Remove any extra fields, but ensure that you do not delete the control or cursor fields.

2.7 - Choose Recording
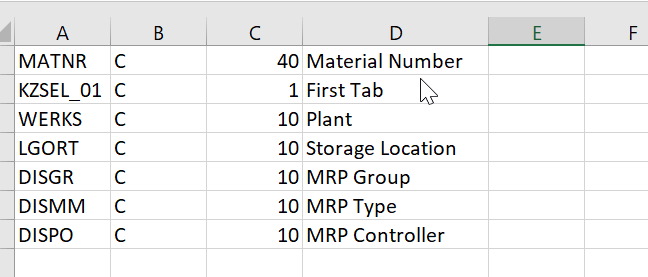
2.8 - Prepare Field List
To avoid field mapping issues later on, it's recommended to prepare an Excel sheet that lists the fields in the same order as they appear on the LSMW screen. This will help streamline the mapping process, allowing you to easily copy and paste the list when you reach the mapping step.
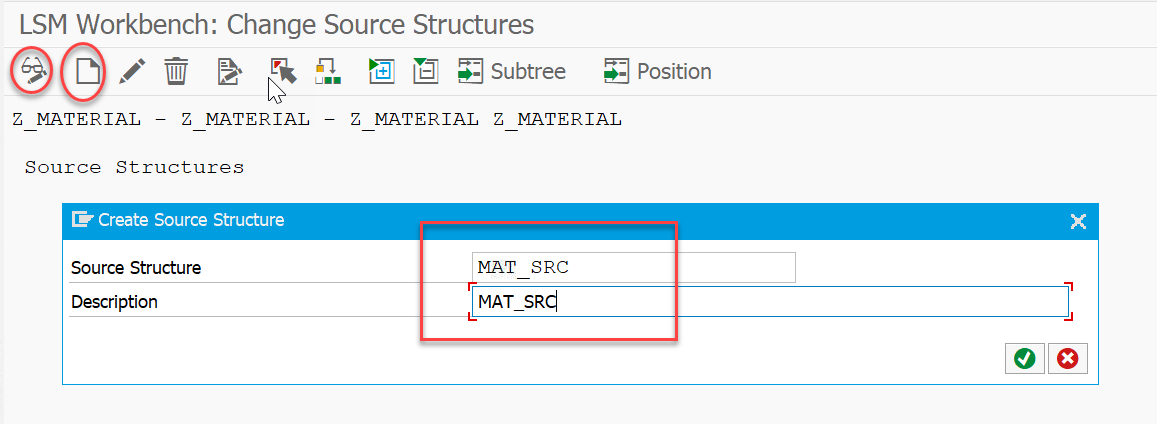
Step 3 - Define Source Structure
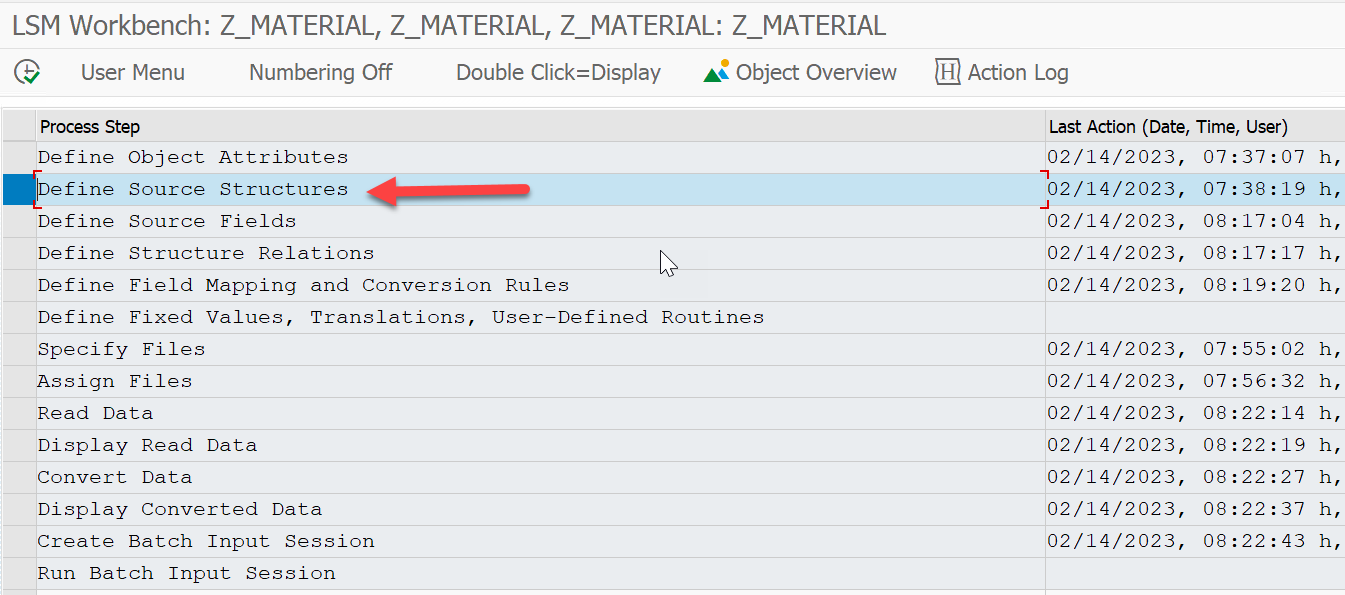
3.1 - Create a Source Structure
Step 4 - Define Source Fields
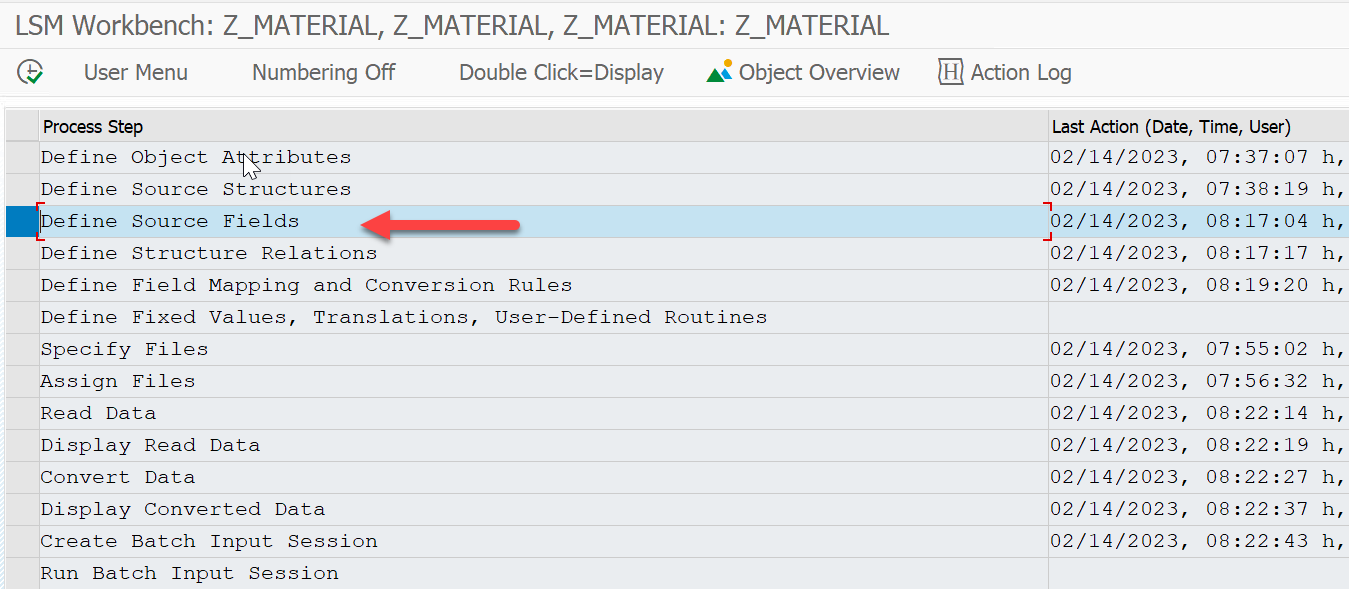
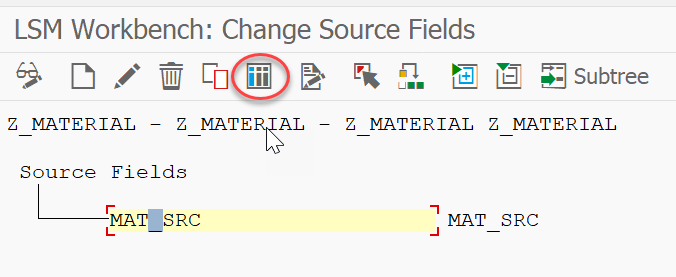
4.1 - Add Source Fields
Copy the list of fields you prepared in Excel and paste them here.
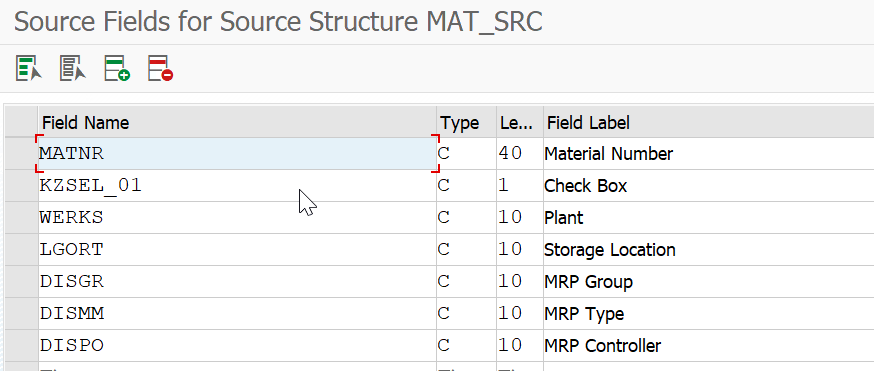
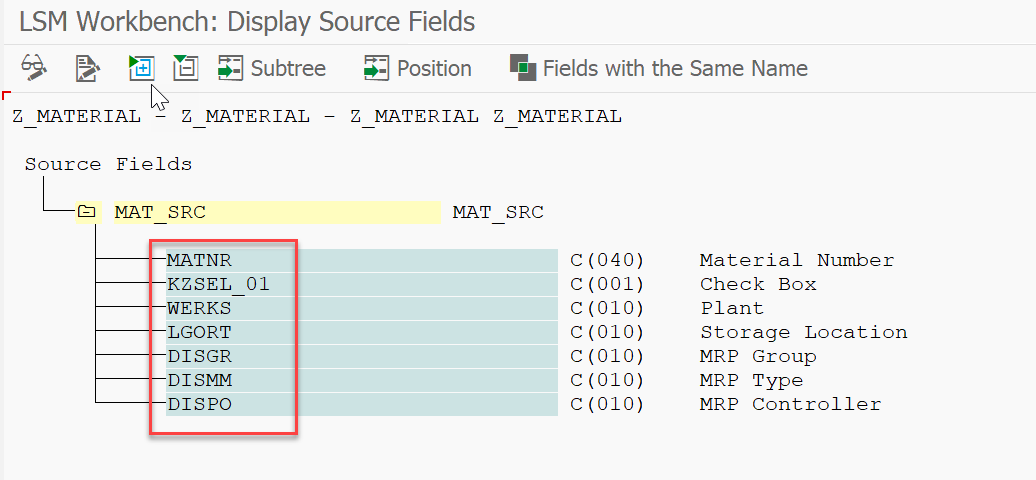
4.2 - Source Fields List
The list of fields will be displayed. Click Save and then return to the previous screen.
Step 5 - Define Structure Relation
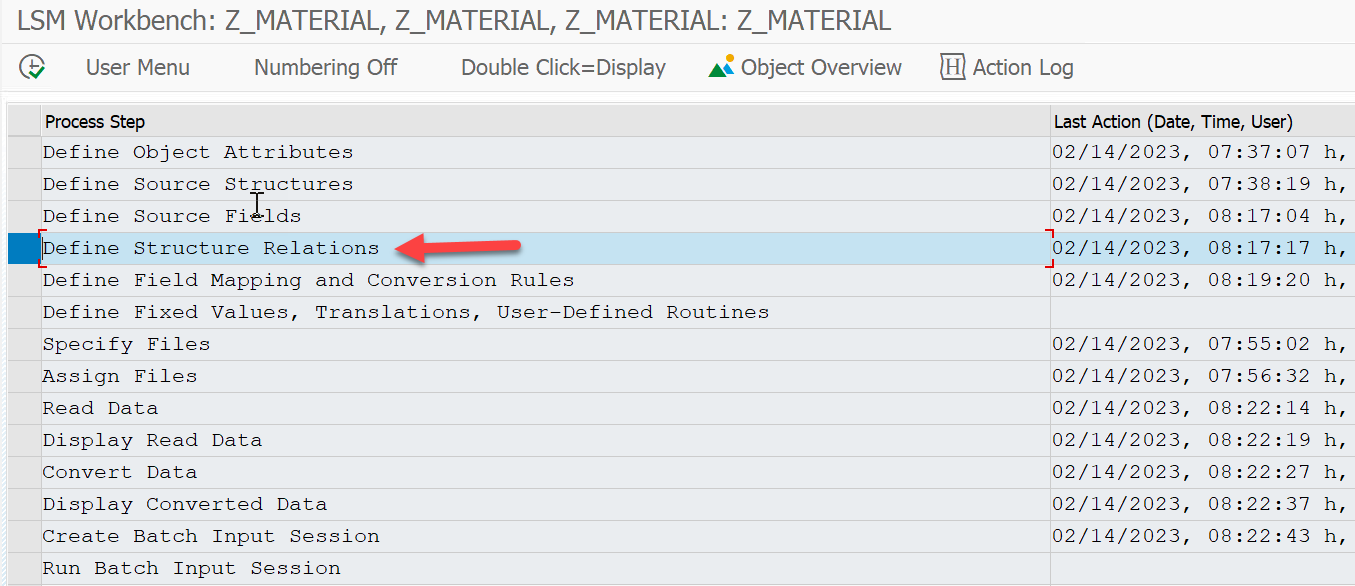
5.1 - Create Structure Relation

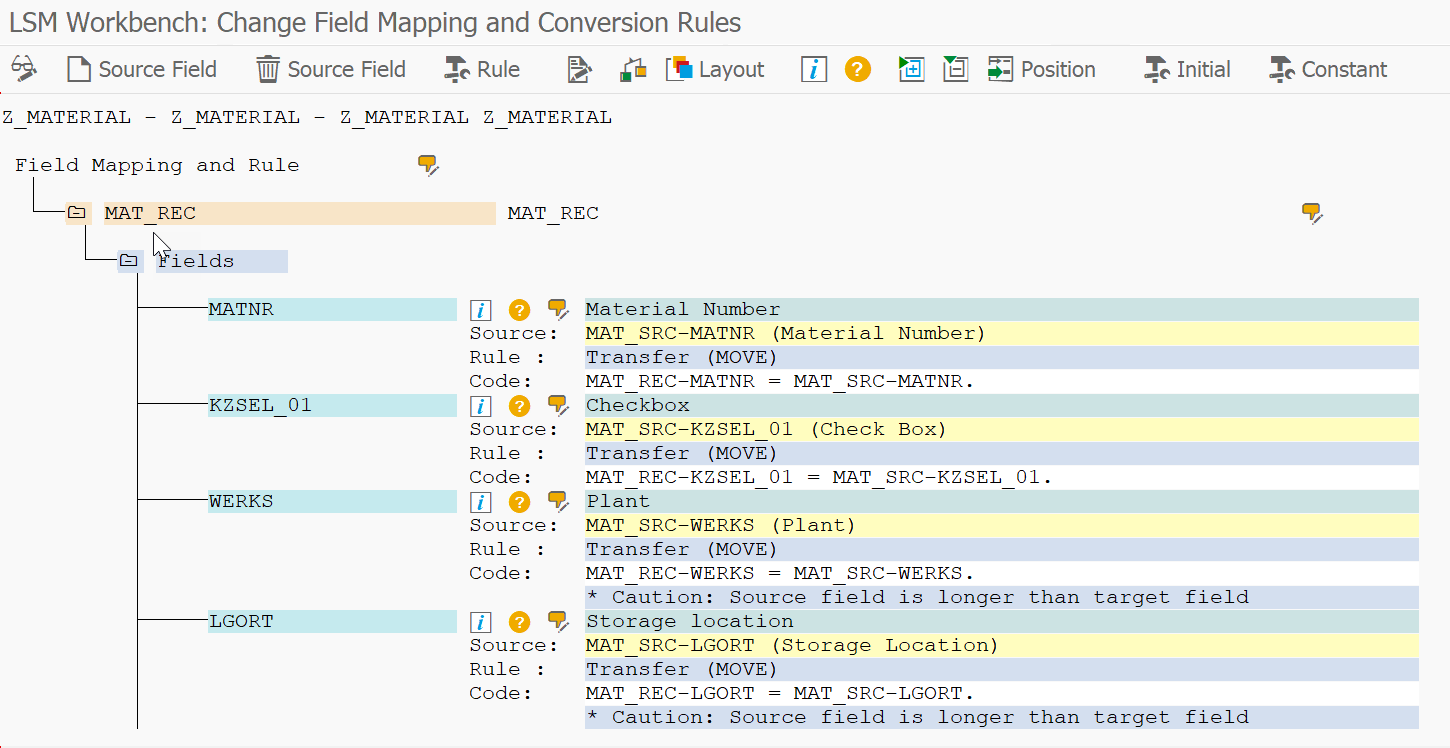
Step 6 - Define Field Mapping and Conversion Rules
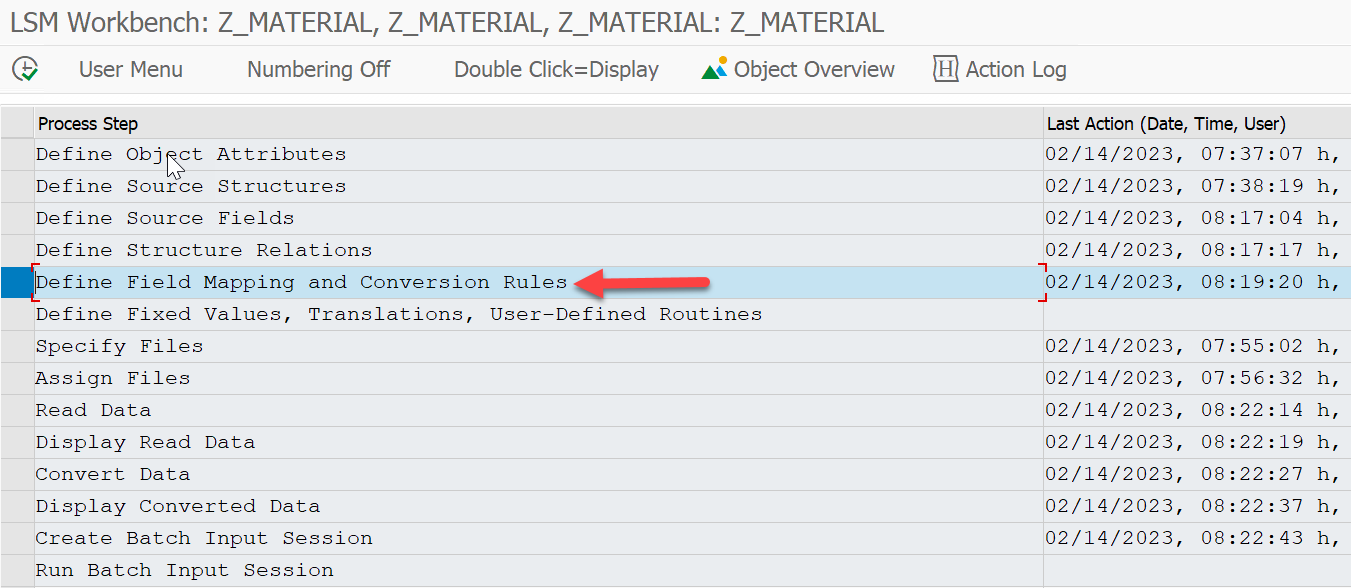
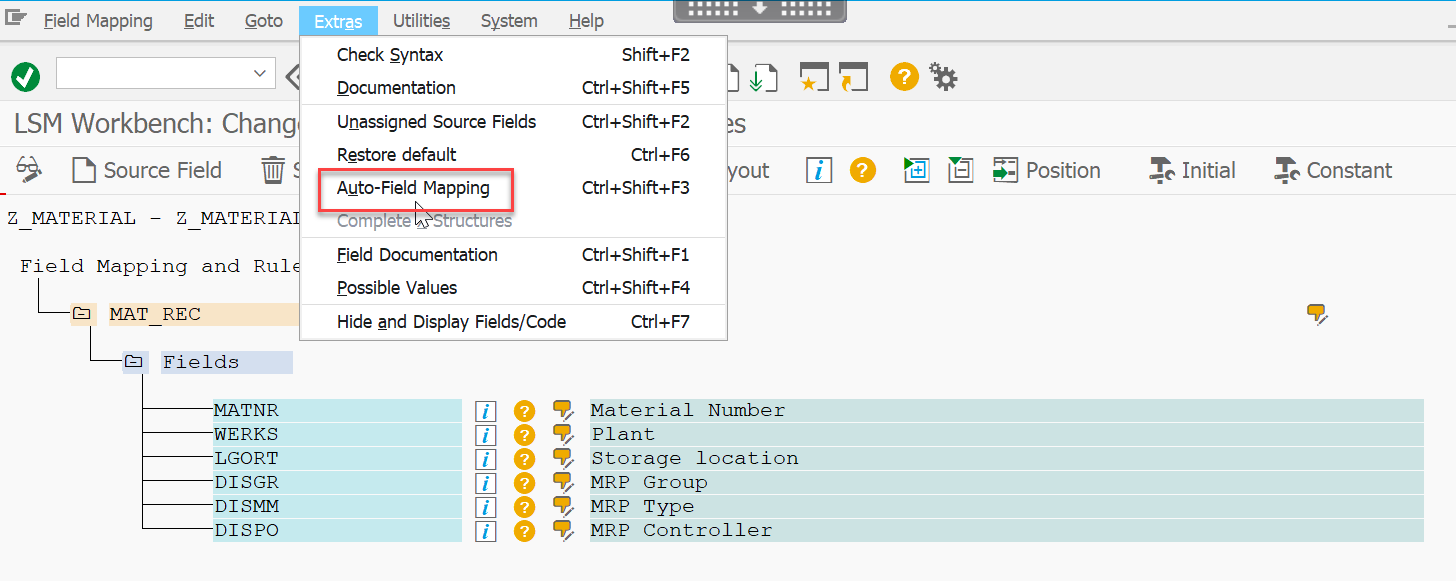
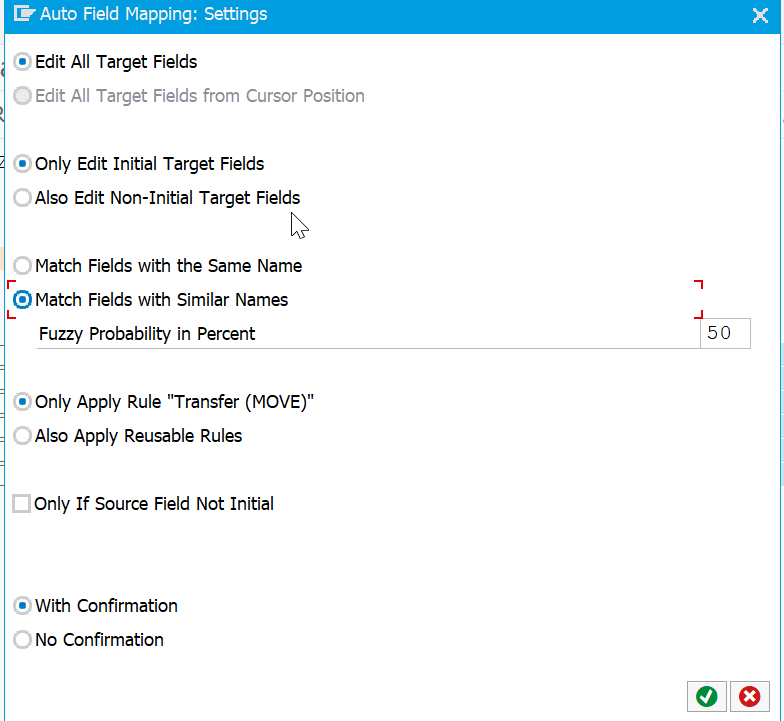
6.1 - Field Mapping
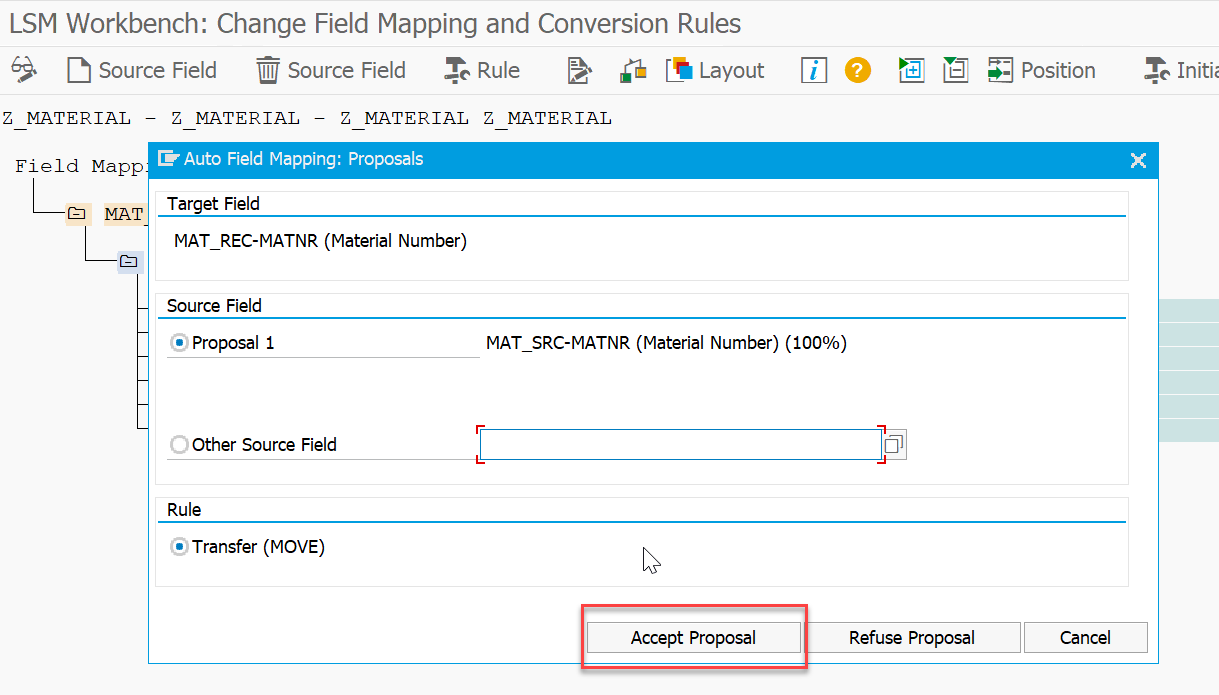
- Select Auto Field-Mapping from the Extra menu and keep the default settings as-is.
- Continue accepting the proposed mappings until you reach the last field.
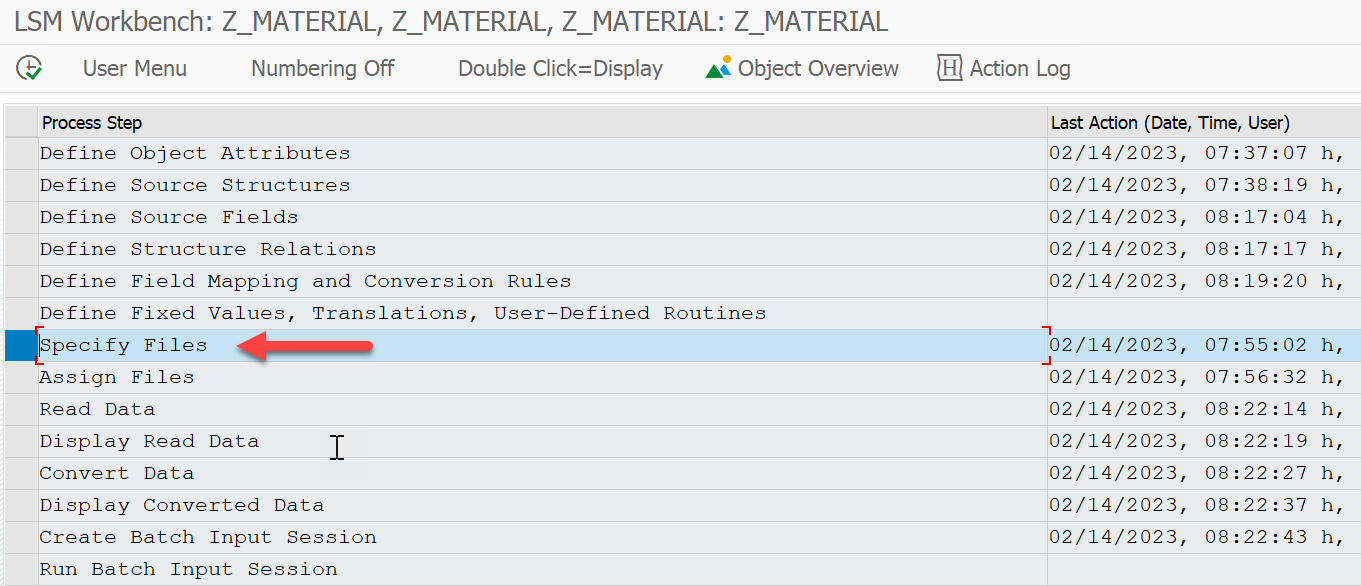
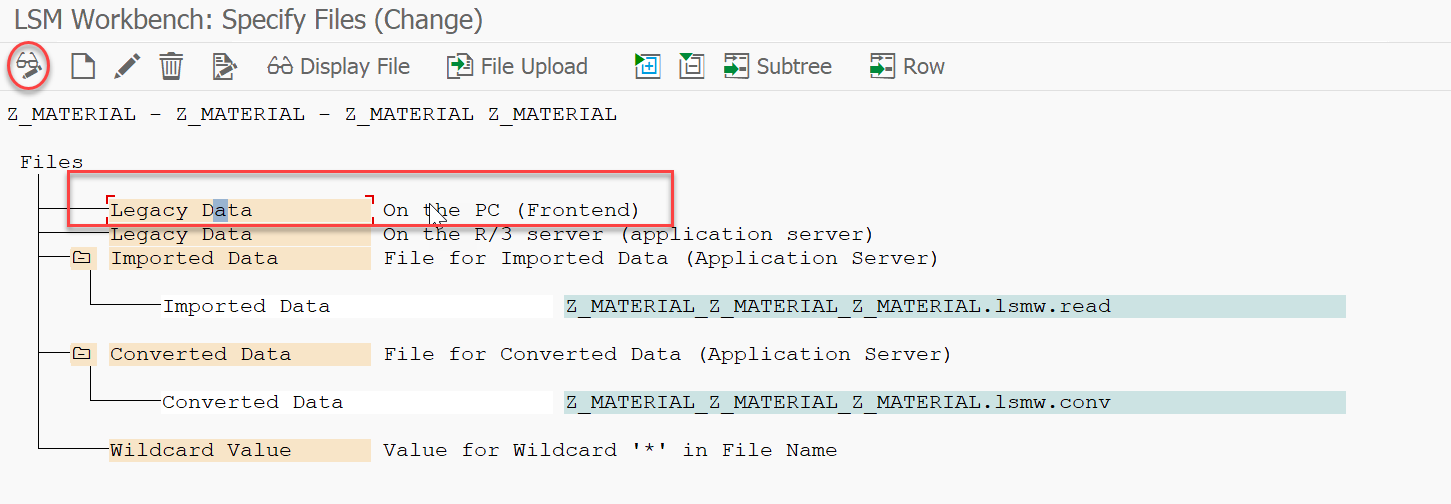
Step 7 - Specify Files
7.1 - Prepare Source File
Prepare the source file in order to organize the data for processing.

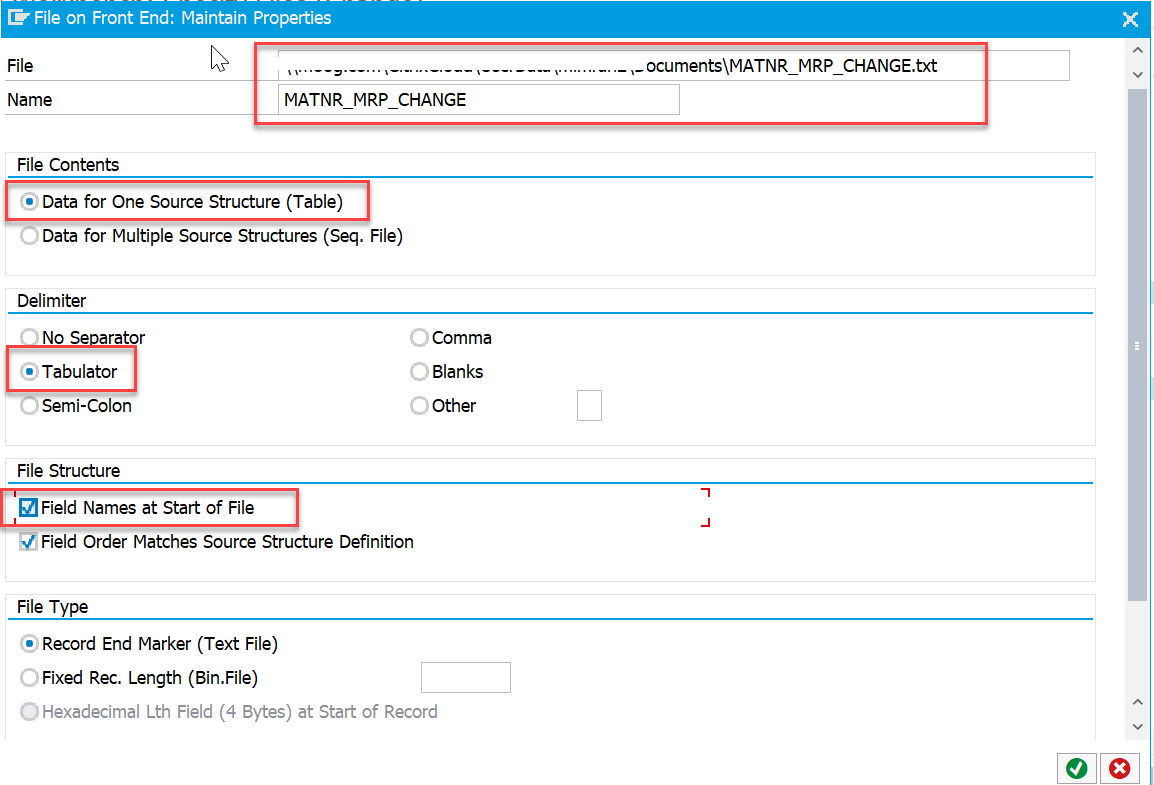
7.2 - Choose File
7.3 - File Setting
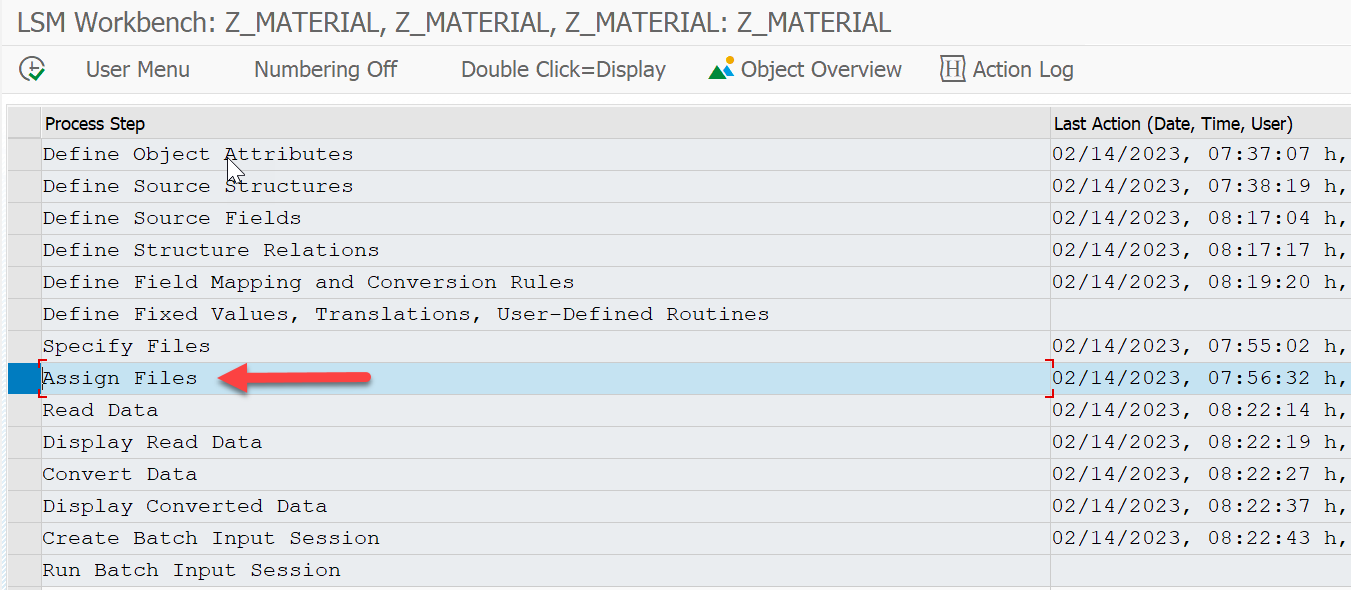
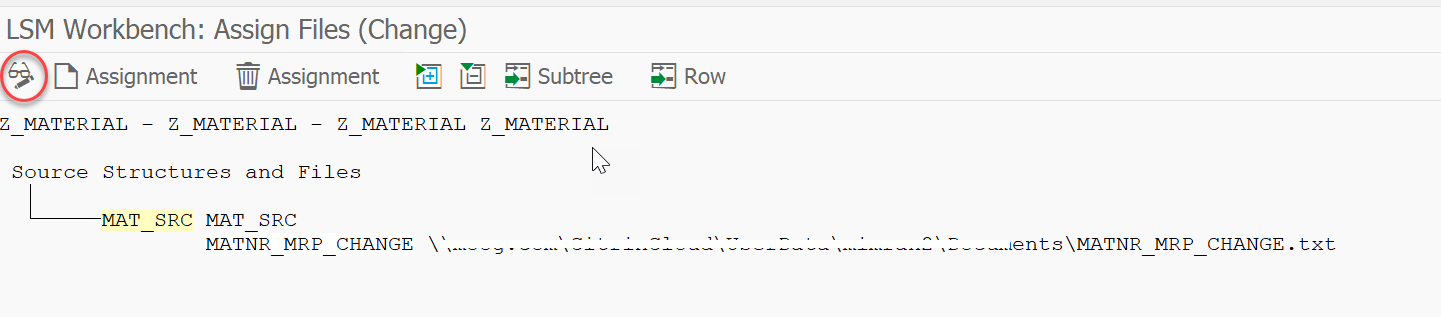
Step 8 - Assign Files
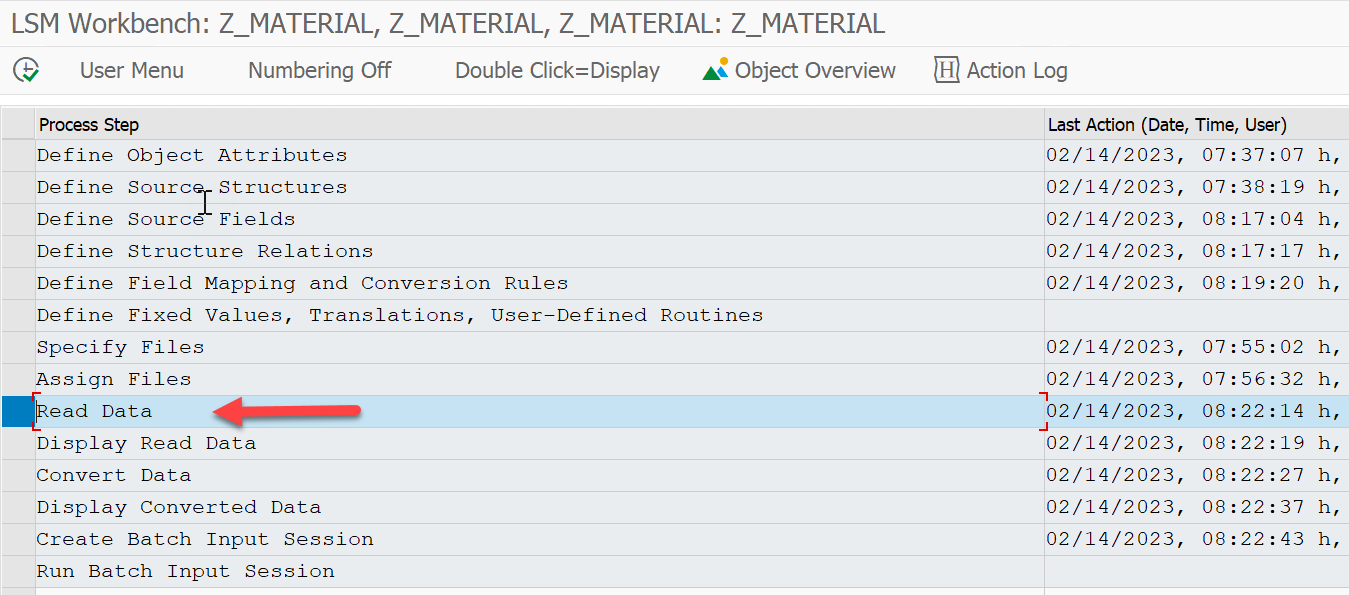
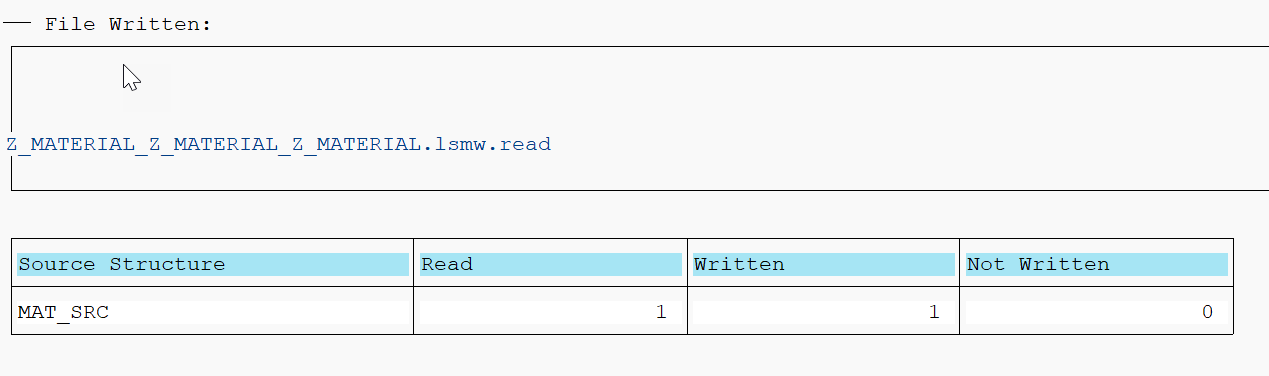
Step 9 - Read Data
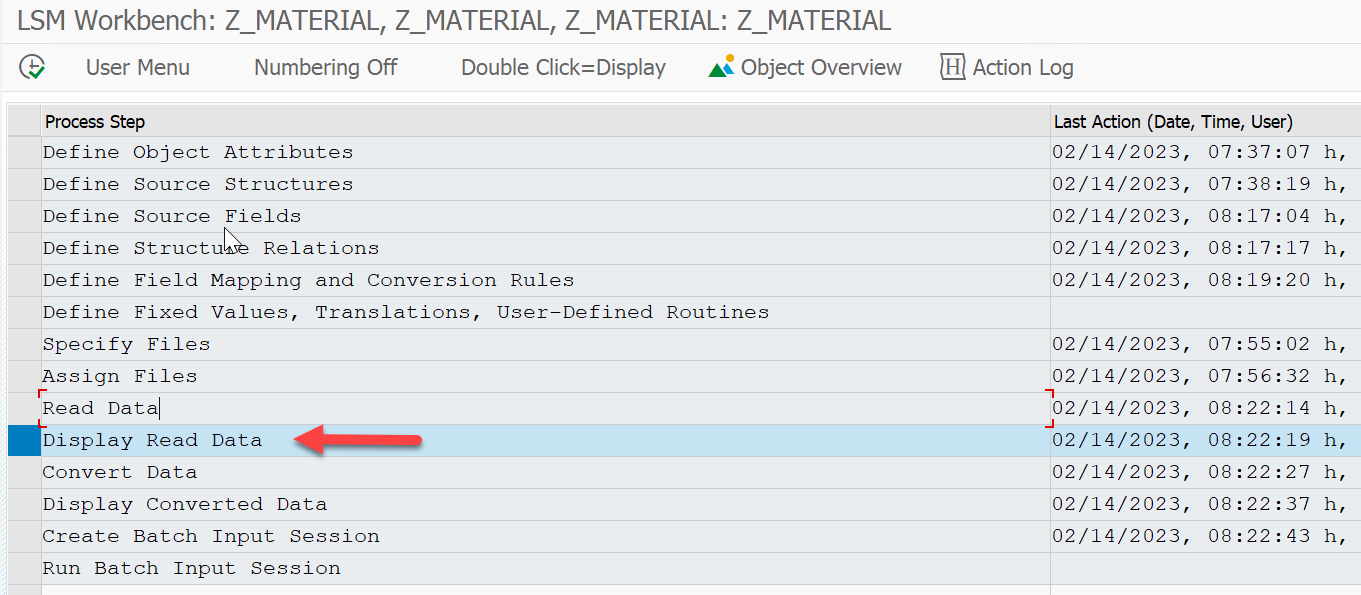
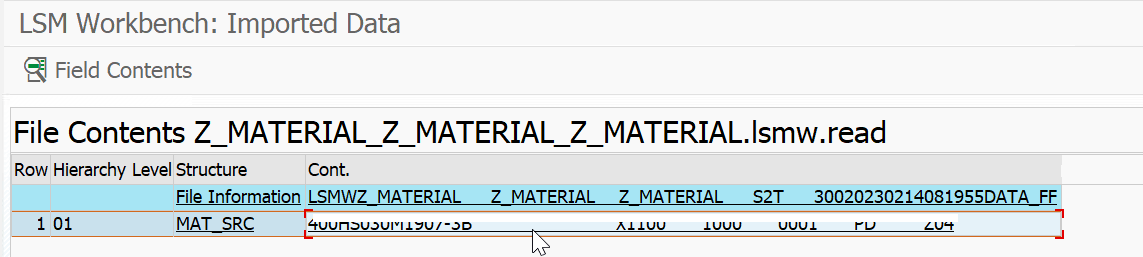
Step 10 - Display Read Data
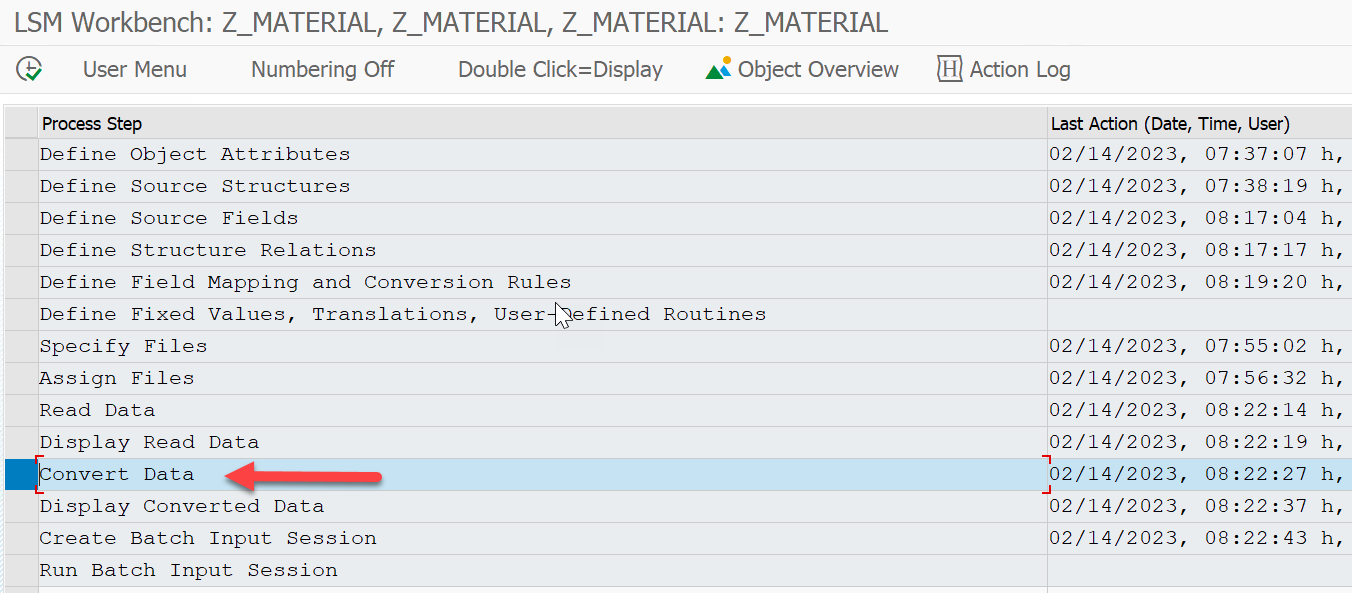
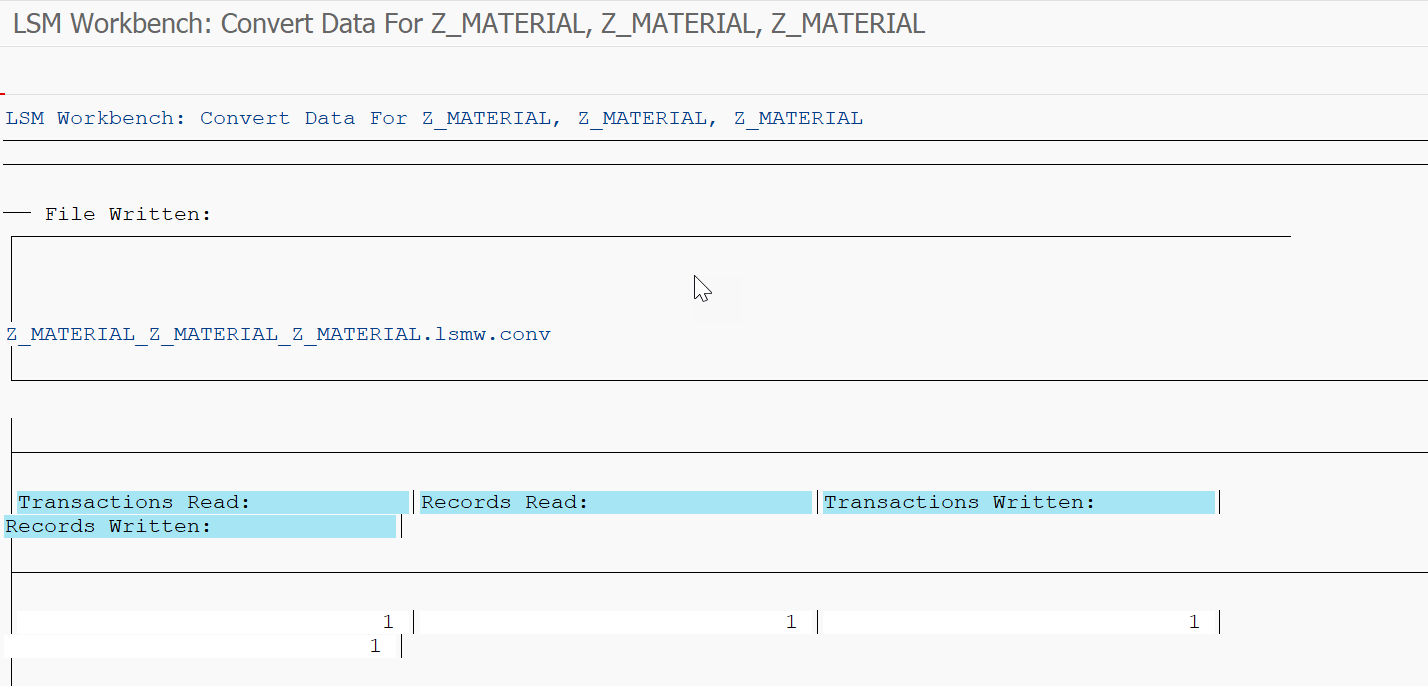
Step 11 - Convert Data
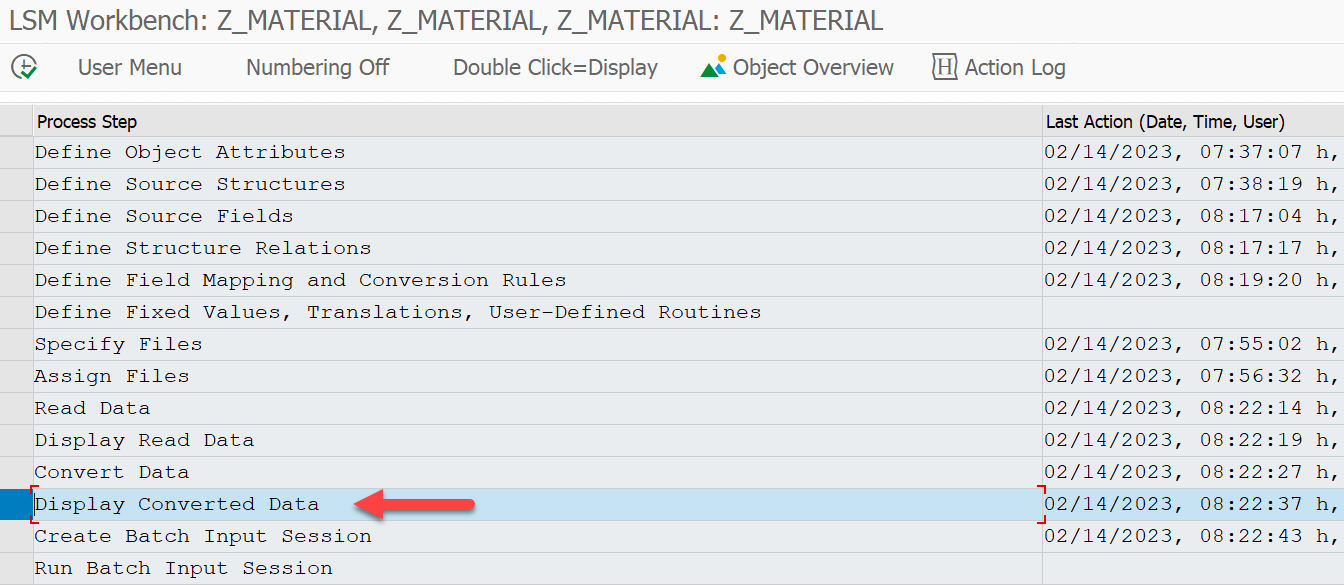
Step 12 - Display Converted Data

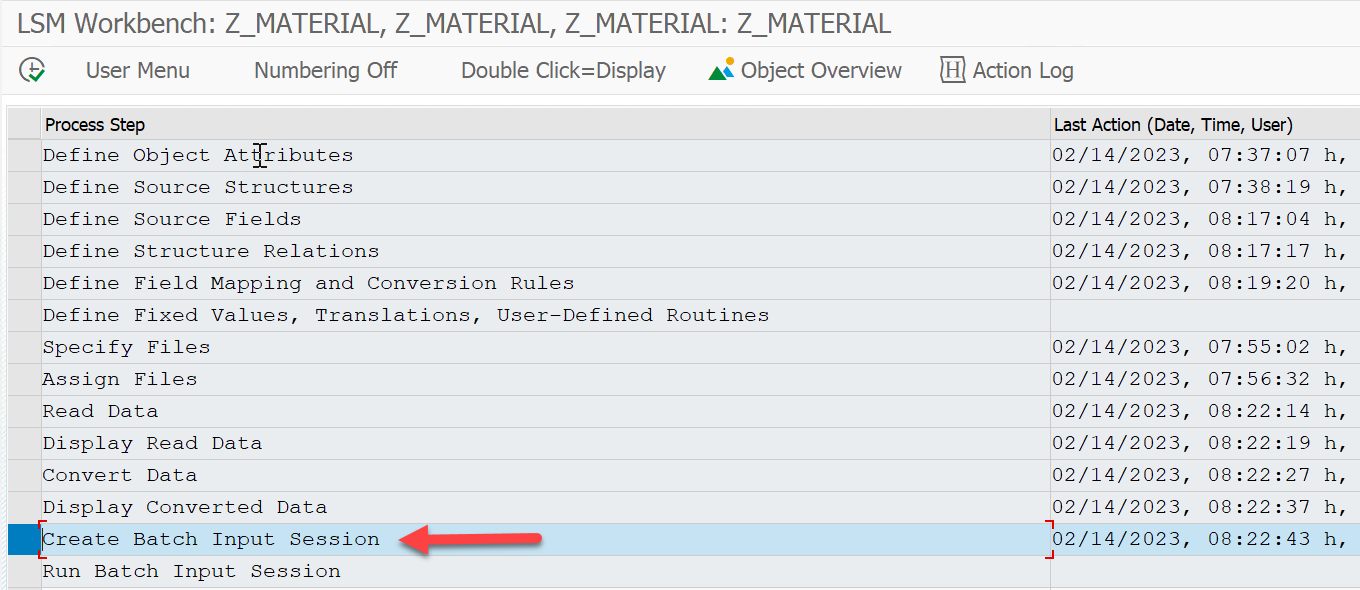
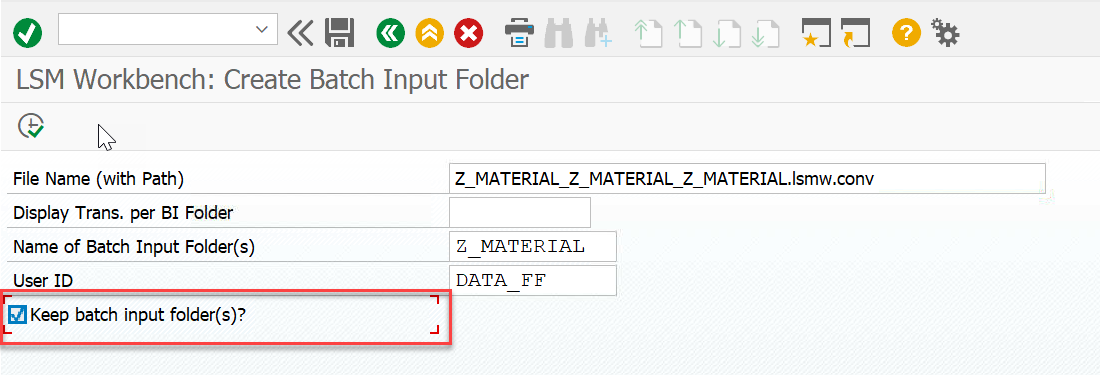
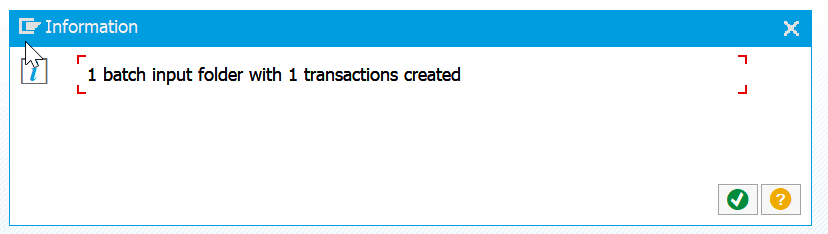
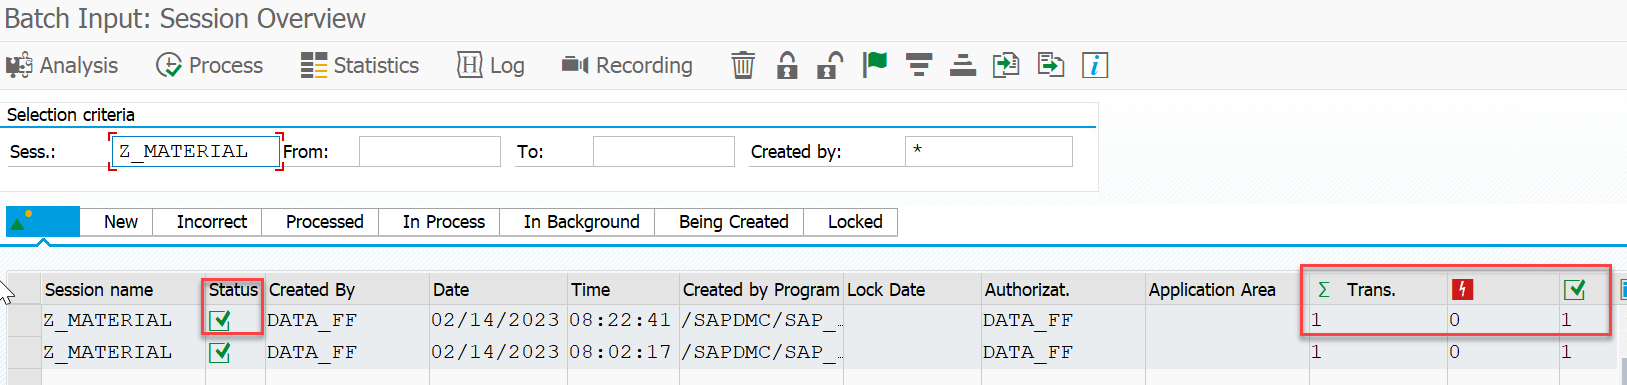
Step 13 - Create Batch Input Session
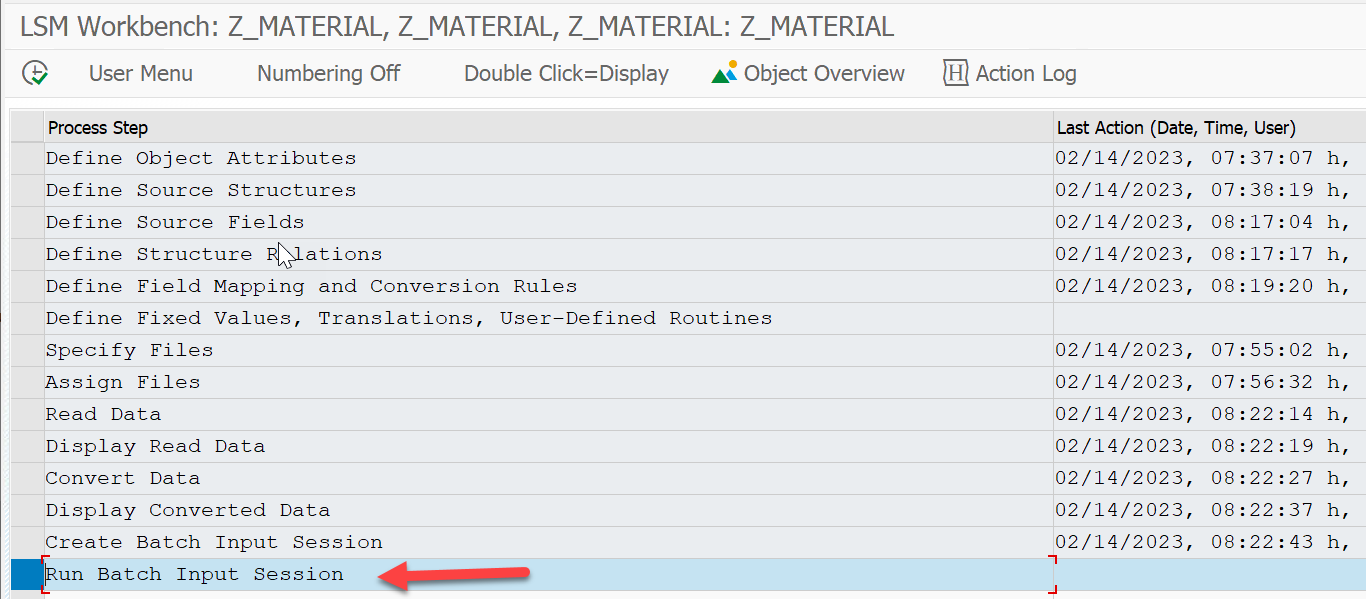
Step 14 - Run Batch Input Session
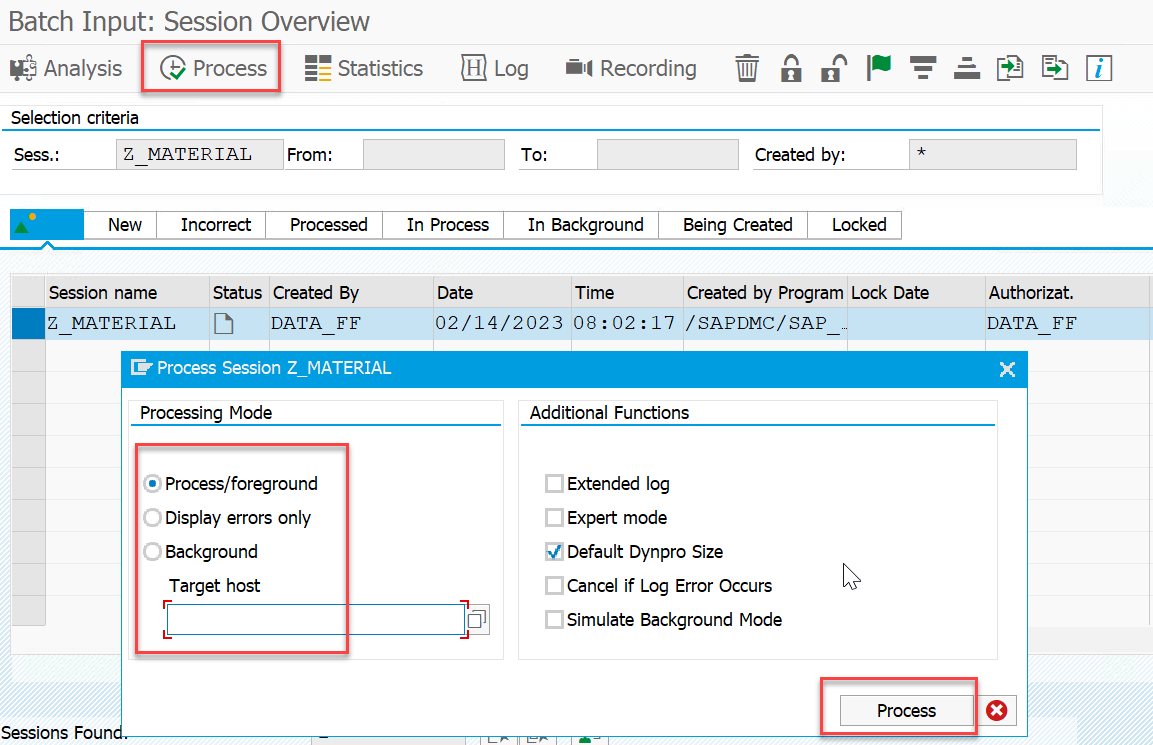
There are three types of Processing Mode:
- Process/Foreground - This mode runs in the foreground. When you hit Enter, control moves to the next screen. It is recommended to test with the first record before running it for all records.
- Display Error Only - This mode runs in the background, but a screen will pop up when an error is encountered. It gives you the option to either skip the error or stop the execution.
- Background - This mode runs entirely in the background. You will be able to see the execution statistics once the process is completed.
Conclusion
You have successfully created an LSMW program and loaded a record using a text file. LSMW is highly useful when you need to update specific fields on a single screen.
It is important to be familiar with the steps required to enter data on the SAP screen, including knowing the transaction code (T-code), how to navigate through the T-code, and which fields need to be updated.
Once you are clear on these steps, you can execute the same activity in LSMW. The recording feature will capture your actions and generate the source fields accordingly.